Install Desktop Environments
Содержание
There are several Desktop Environments and Window Managers available for Manjaro, each with their own unique style, interface, and features. Furthermore, it is possible to install multiple environments if desired, which can be selected at the login screen at any time. Users are not restricted to whatever comes pre-installed with a particular flavour of Manjaro.
It is worth noting that a Desktop Environment(DE) is not a single entity; it is actually a collection of different components that work together. This commonly includes a:
Where additional (and optional) extras for a desktop environment are available, the terminal commands to obtain these have also been provided.
Some important information about installing the Manjaro settings packages:
The Risks of Using Multiple DEs
Installing multiple DEs is not without risks. Here are some things that can pop-up when running more than one DE:
These risks are greatly reduced by using a different user account for each DE.
In summary, running multiple DEs is possible and a great way to enjoy Manjaro but it requires a willingness to troubleshoot and work through minor problems. If you are the type of person who wants everything to «just work» out of the box, running multiple DEs might not be for you.
XFCE is a lightweight and versatile desktop environment that utilises a classic drop-down or pop-up menu to access applications. It is also compatible with Compiz. A little time and effort will also be required to properly customise the desktop to suit personal taste. A 64 bit installation of Manjaro running XFCE uses about 390MB of memory. As of version 18, Manjaro has moved to the gtk3 version of XFCE.
Install a basic XFCE environment
Optional: Install and use LightDM, the recommended display manager for XFCE
edit /etc/lightdm/lightdm.conf, under [Seat:*] replace the greeter-session setting with greeter-session=lightdm-gtk-greeter
Optional: Install the Manjaro configuration and theming for XFCE
To configure LightDM to match the official iso replace the contents of /etc/lightdm/lightdm-gtk-greeter.conf with
Create a new user for the new desktop environment
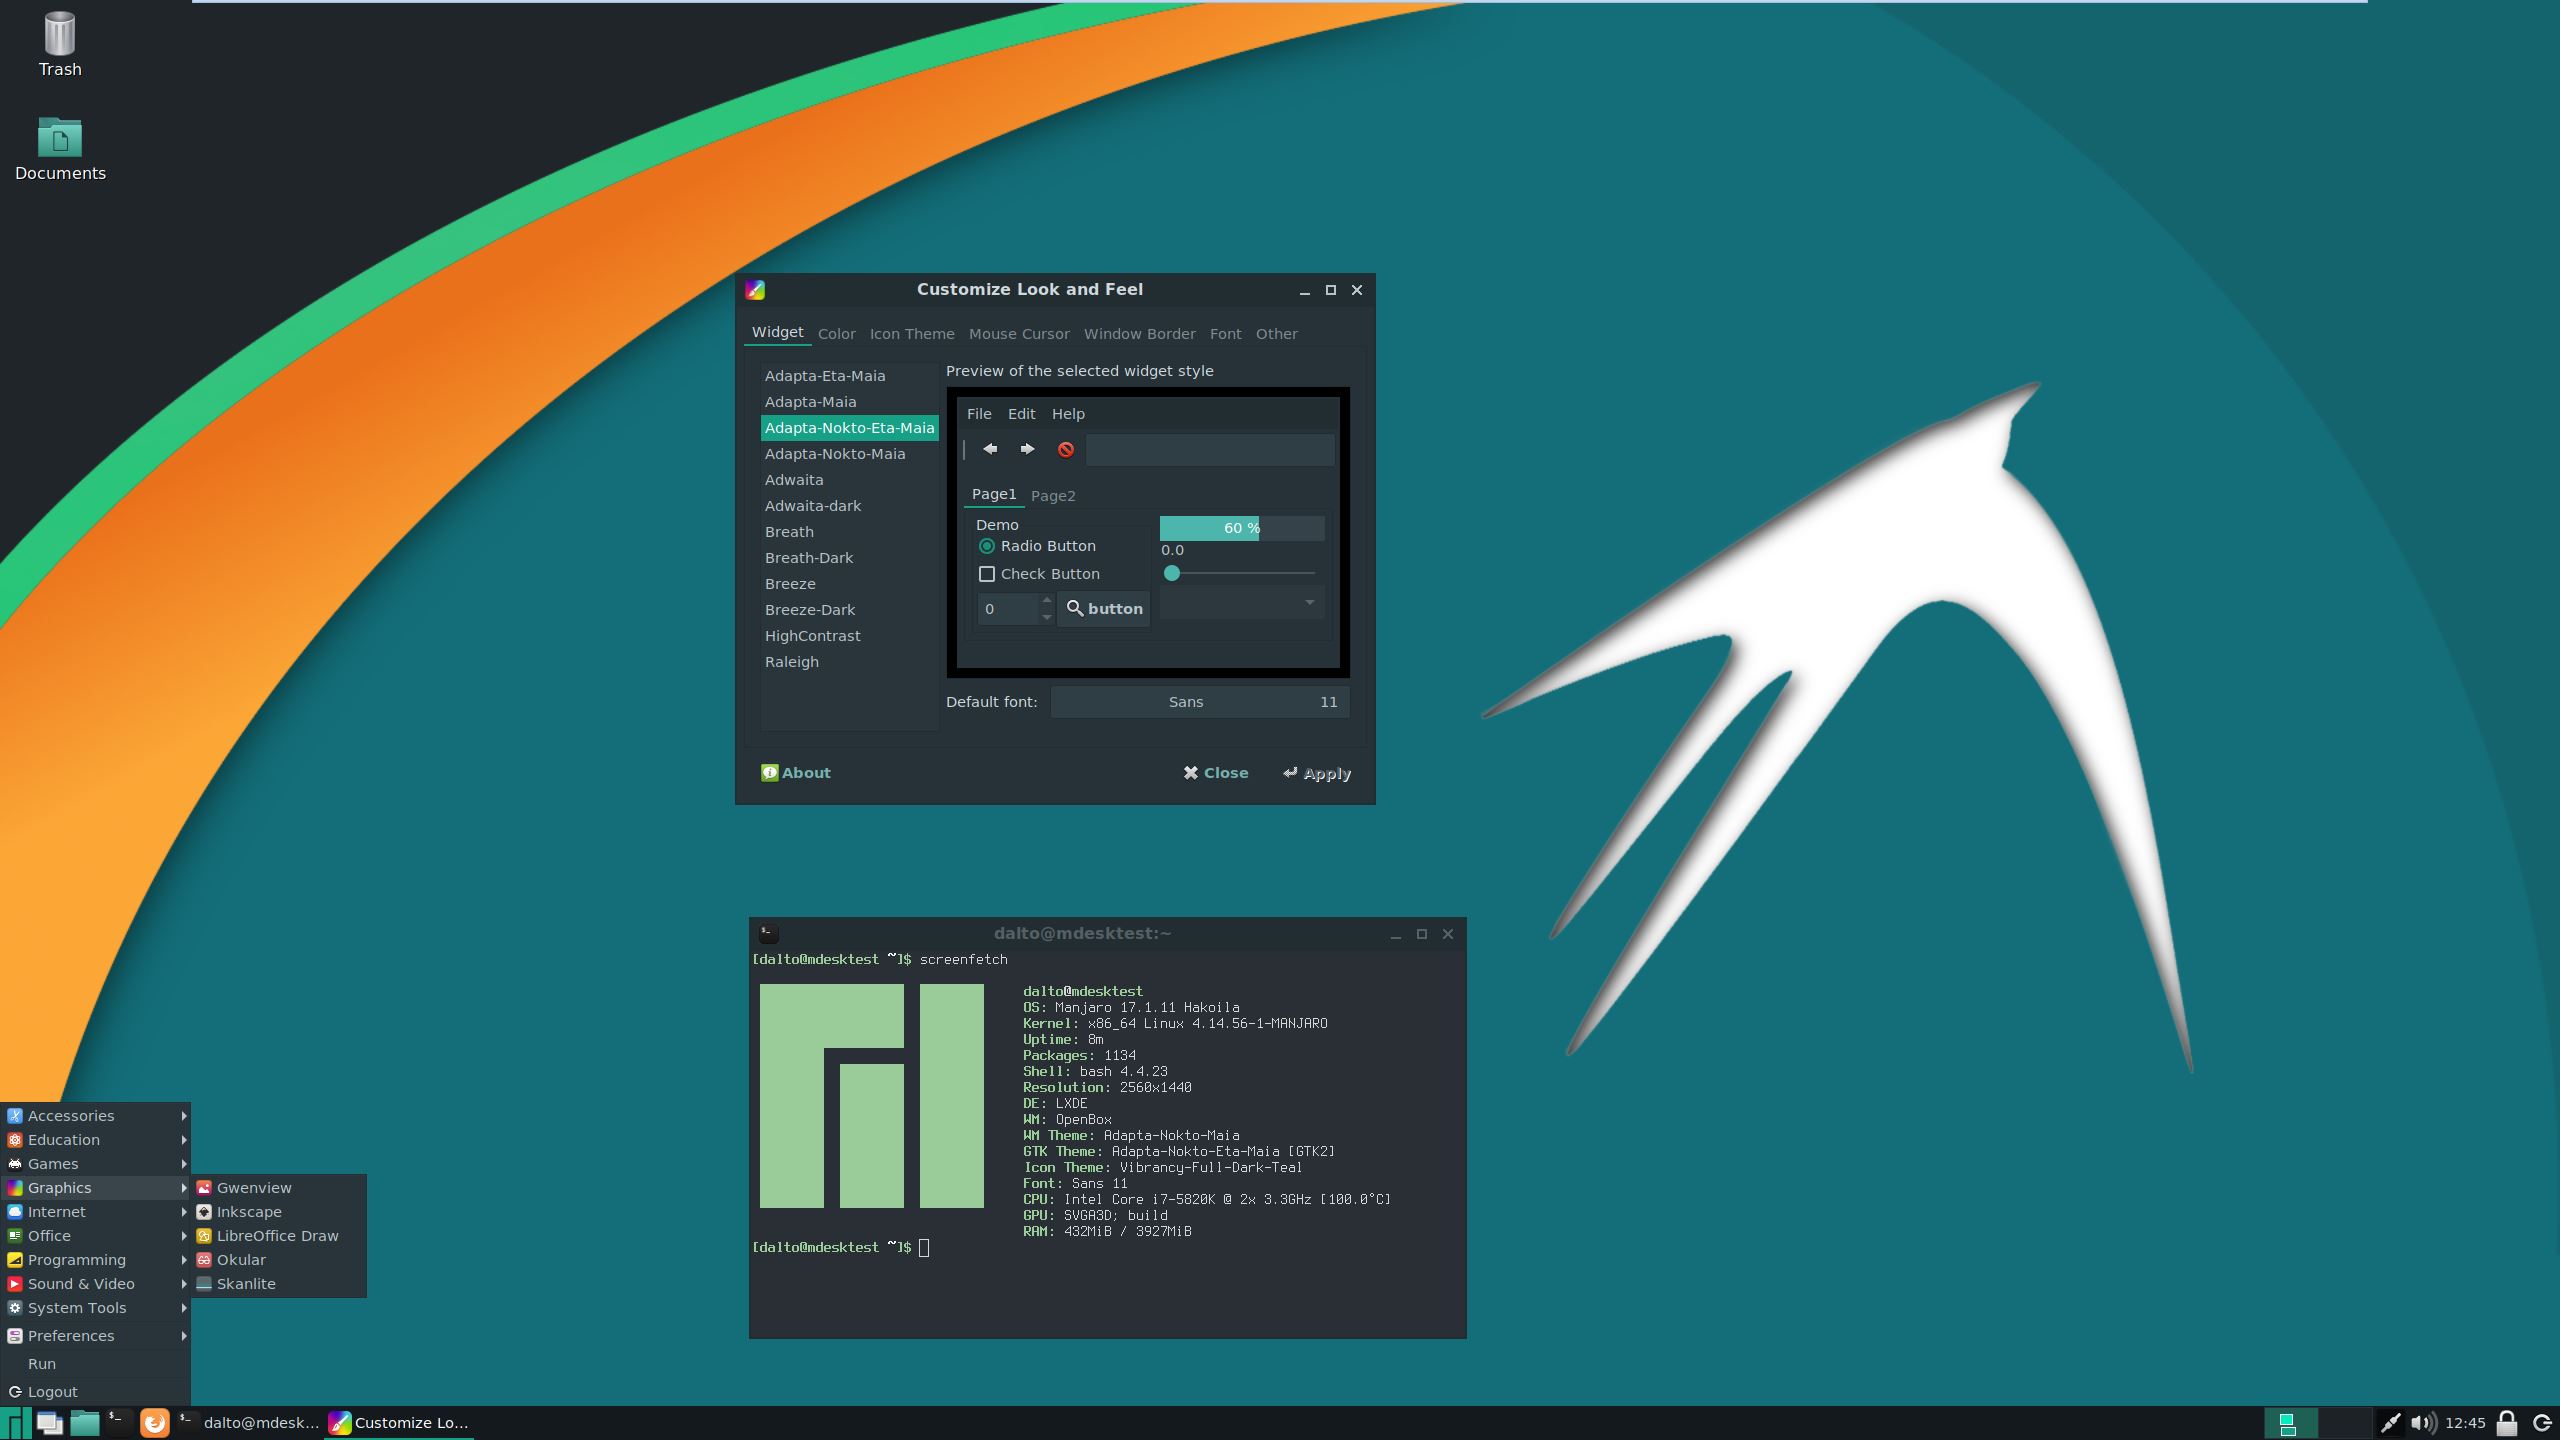
KDE Plasma 5
The KDE community offers Plasma, a feature-rich and versatile desktop environment that provides several different styles of menu to access applications. Its default window manager is kwin, but is also compatible with Compiz. An excellent built-in interface to easily access and install new themes, widgets, etc, from the internet is also worth mentioning. A 64 bit installation of Manjaro running KDE uses about 455MB of memory.
Install a basic KDE Plasma environment
Optional: Install KDE applications
To install a full set of K* applications use kde-applications. This will be
300 packages(including dependencies)
Optional: Install and use SDDM, the recommended display manager for KDE
SDDM is installed as a dependency of plasma. To enable it
Optional: Install the Manjaro configuration and theming for plasma
Open plasma settings, go to Startup & Shutdown->Login Screen and select «Breath»
Alternatively, the newer themes may be installed with:
Create a new user for the new desktop environment
Gnome 3
Gnome 3 is an intuitive desktop environment that utilises a tablet or smartphone style interface to access applications. It is not compatible with compiz. Although Gnome is very easy to learn and use, its customisation options are quite limited, and it can be difficult to configure. A 64 bit installation of Manjaro running Gnome uses about 447MB of memory.
Install a basic gnome environment
Optional: To install extra themes, games, and features
Optional: Install and use GDM, the recommended display manager for gnome
GDM is installed as a dependency of gnome, to enable it
Optional: Install the Manjaro configuration and theming for gnome
Create a new user for the new desktop environment
Budgie
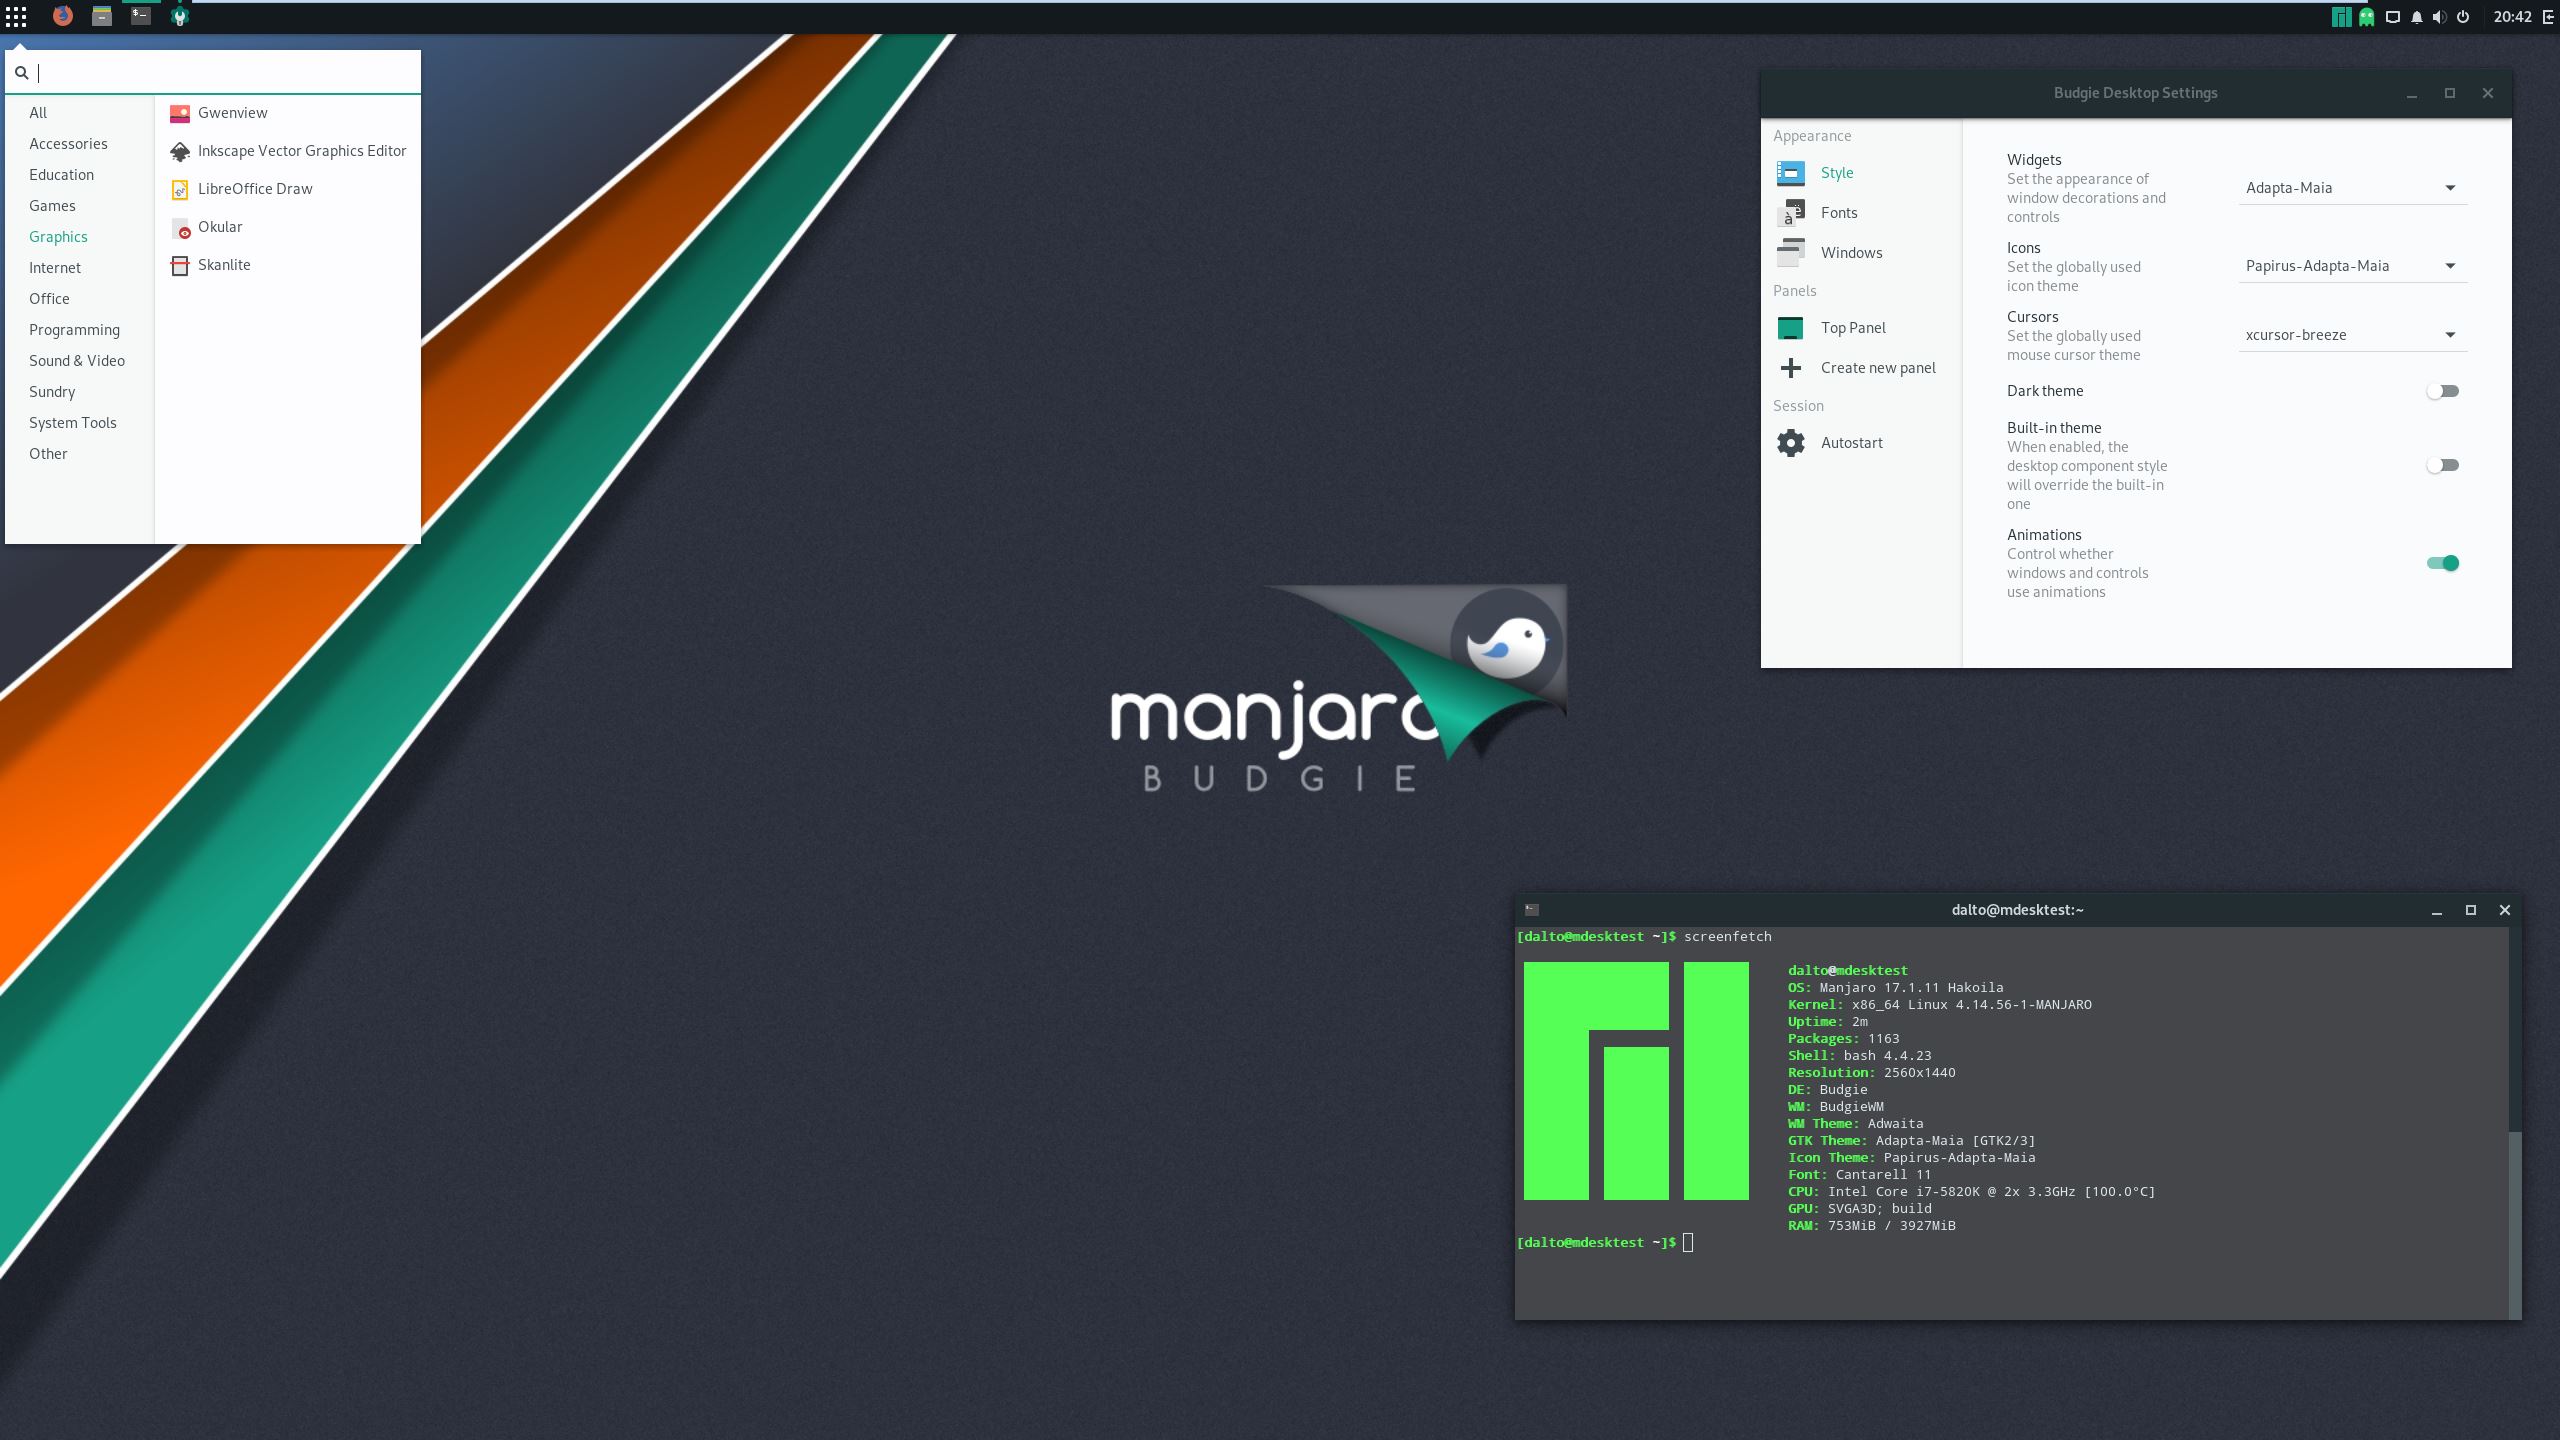
The Budgie Desktop is a modern desktop designed to keep out the way of the user. It features heavy integration with the GNOME stack in order for an enhanced experience. A 64 bit installation of Manjaro running budgie uses about 632MB of memory.
Install a basic budgie environment
Optional: Install additional commonly used components
Optional: Install and use LightDM, the recommended display manager for budgie
edit /etc/lightdm/lightdm.conf, under [Seat:*] replace the greeter-session setting with greeter-session=lightdm-slick-greeter
Optional: Install the Manjaro configuration and theming for budgie
To configure LightDM to match the official iso replace the contents of /etc/lightdm/slick-greeter.conf with
Create a new user for the new desktop environment
Cinnamon
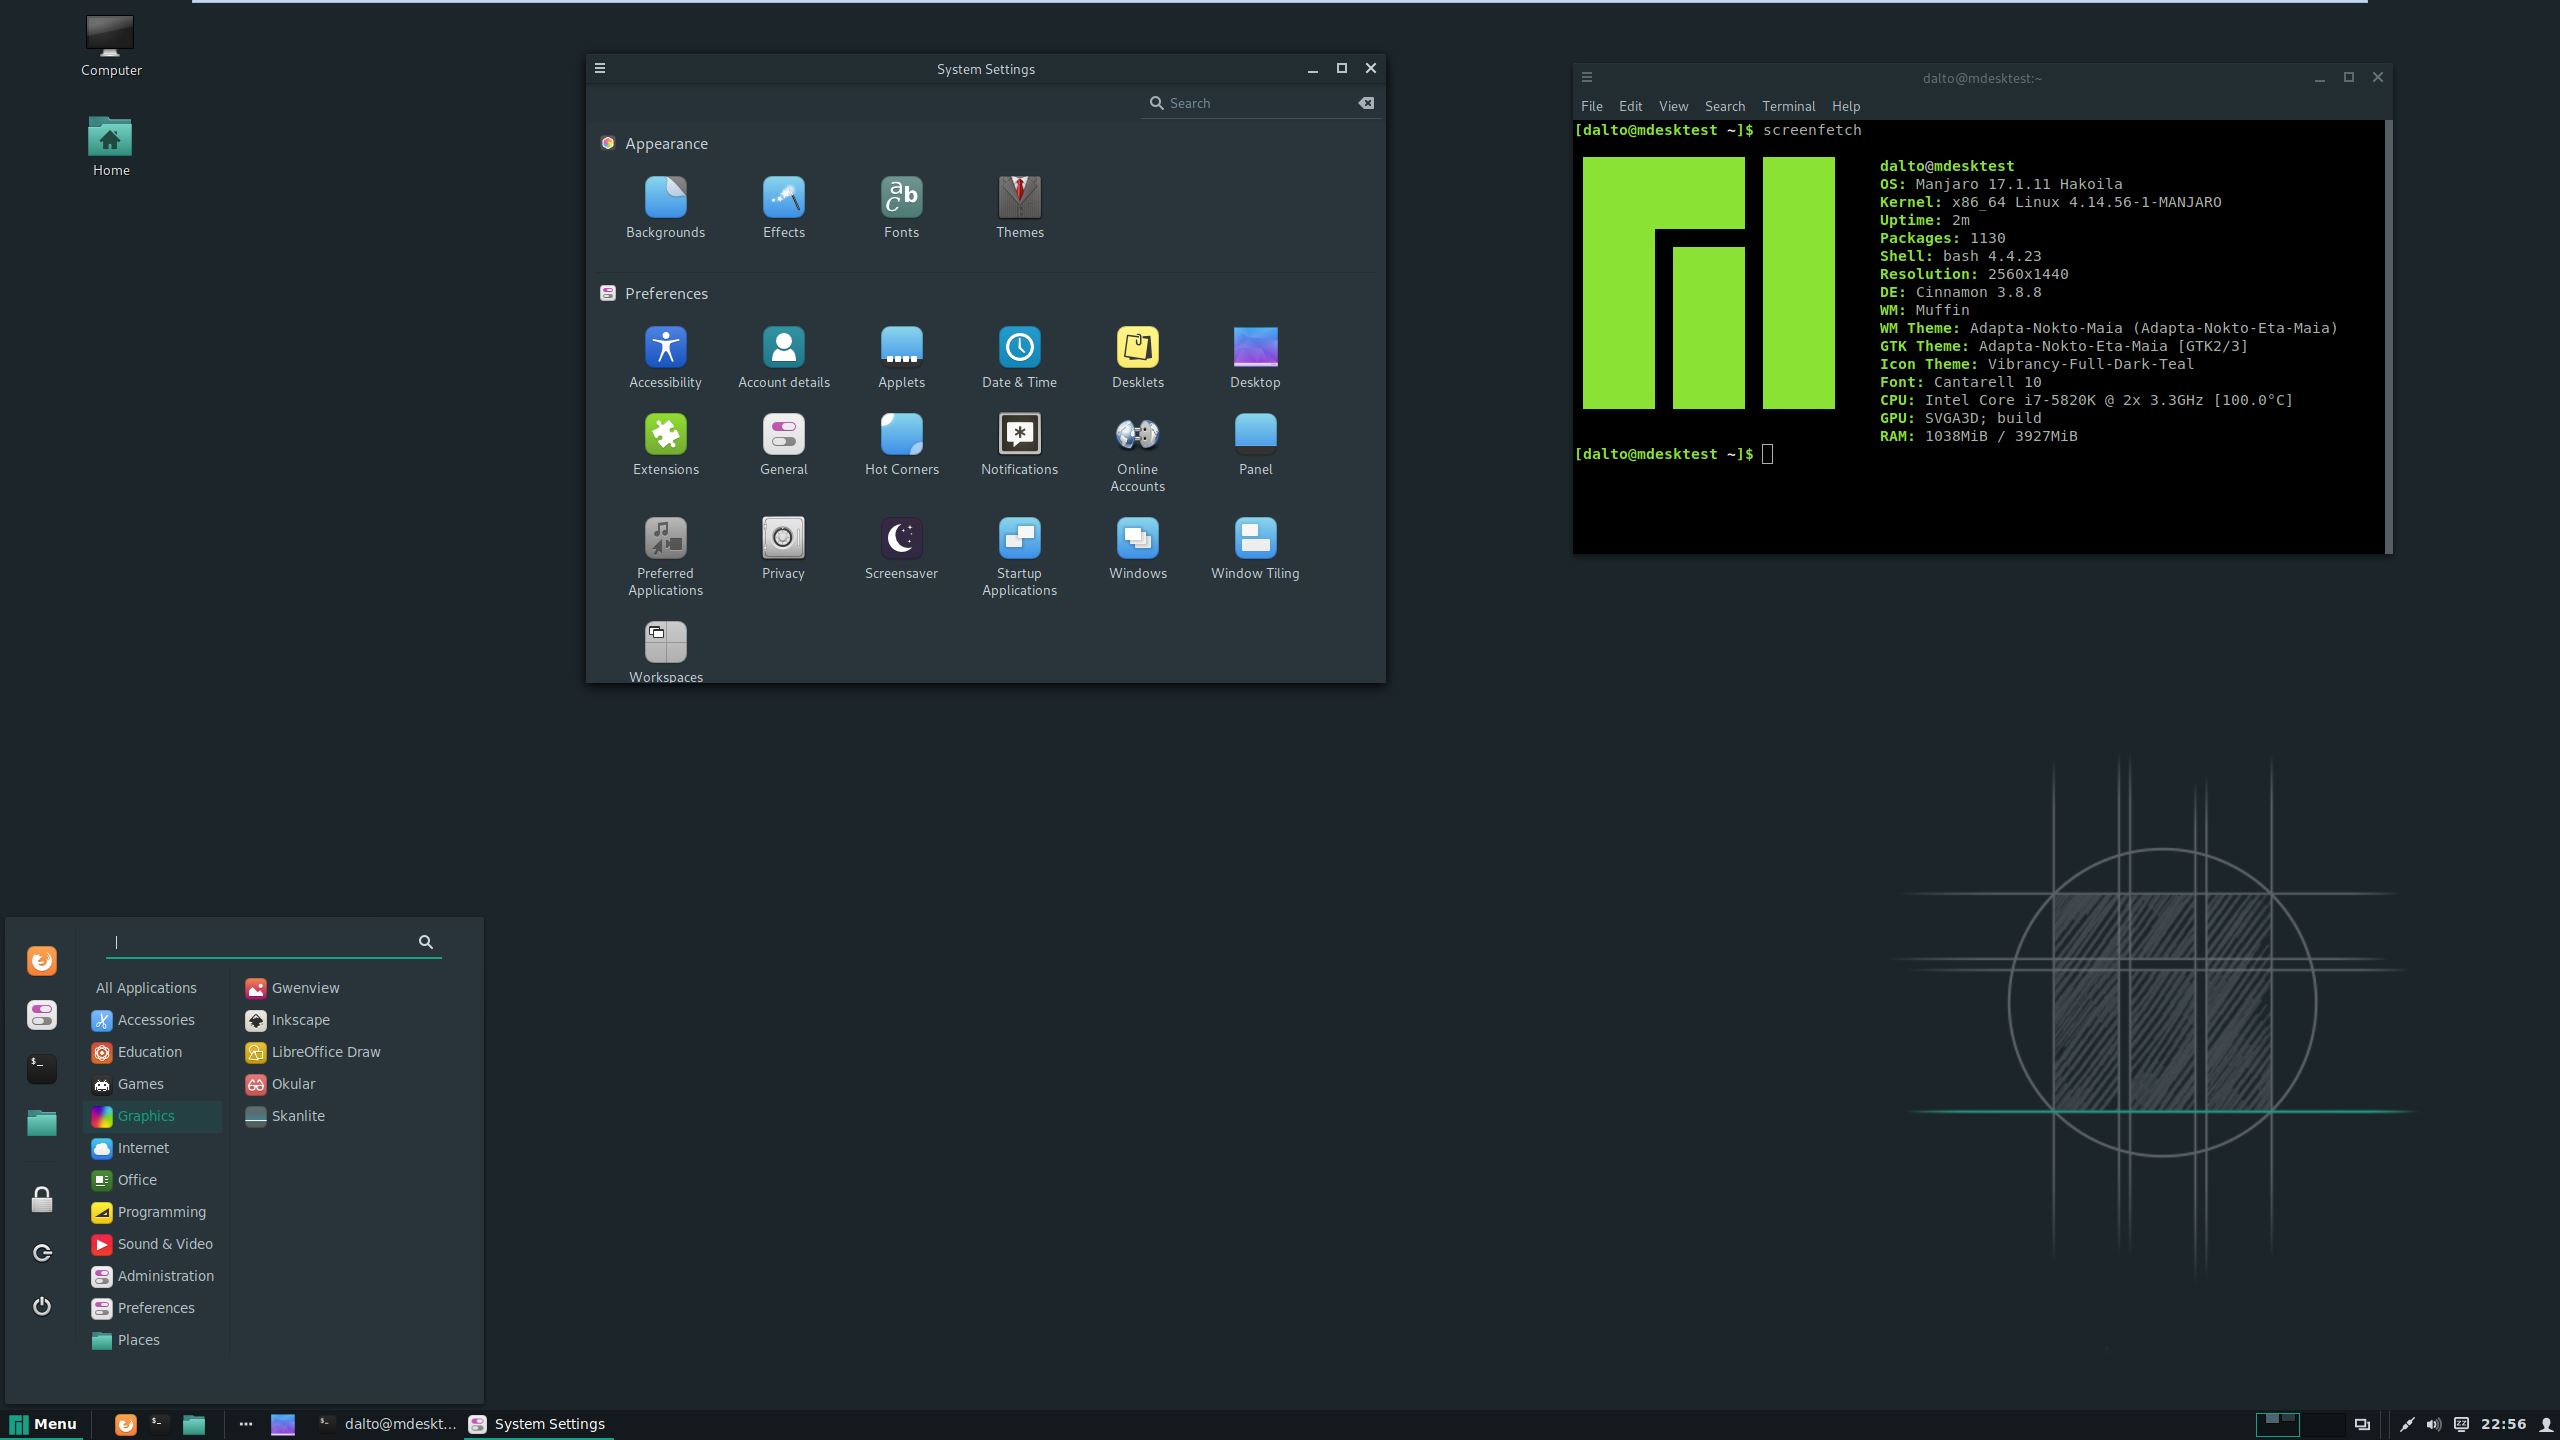
Cinnamon is a desktop environment based on Gnome 3 that utilises a large panel-style menu to access applications. It is not compatible with compiz. Despite being based on Gnome, it has more customisation options and is easier to configure. Users of Windows Vista or Windows 7 may find Cinnamon’s interface comfortably familiar. A 64 bit installation of Manjaro running Cinnamon uses about 665MB of memory.
Install a basic cinnamon environment
Optional: Install additional commonly used components
Optional: Install and use LightDM, the recommended display manager for cinnamon
Then edit /etc/lightdm/lightdm.conf, under [Seat:*] replace the greeter-session setting with greeter-session=lightdm-slick-greeter
Optional: Install the Manjaro configuration and theming for cinnamon
To configure LightDM to match the community edition replace the contents of /etc/lightdm/slick-greeter.conf with
Set the Manjaro logo on the panel by right-clicking on the menu and clicking configure. Select «Use a custom icon and label». Select the Manjaro icon.
Create a new user for the new desktop environment
Deepin
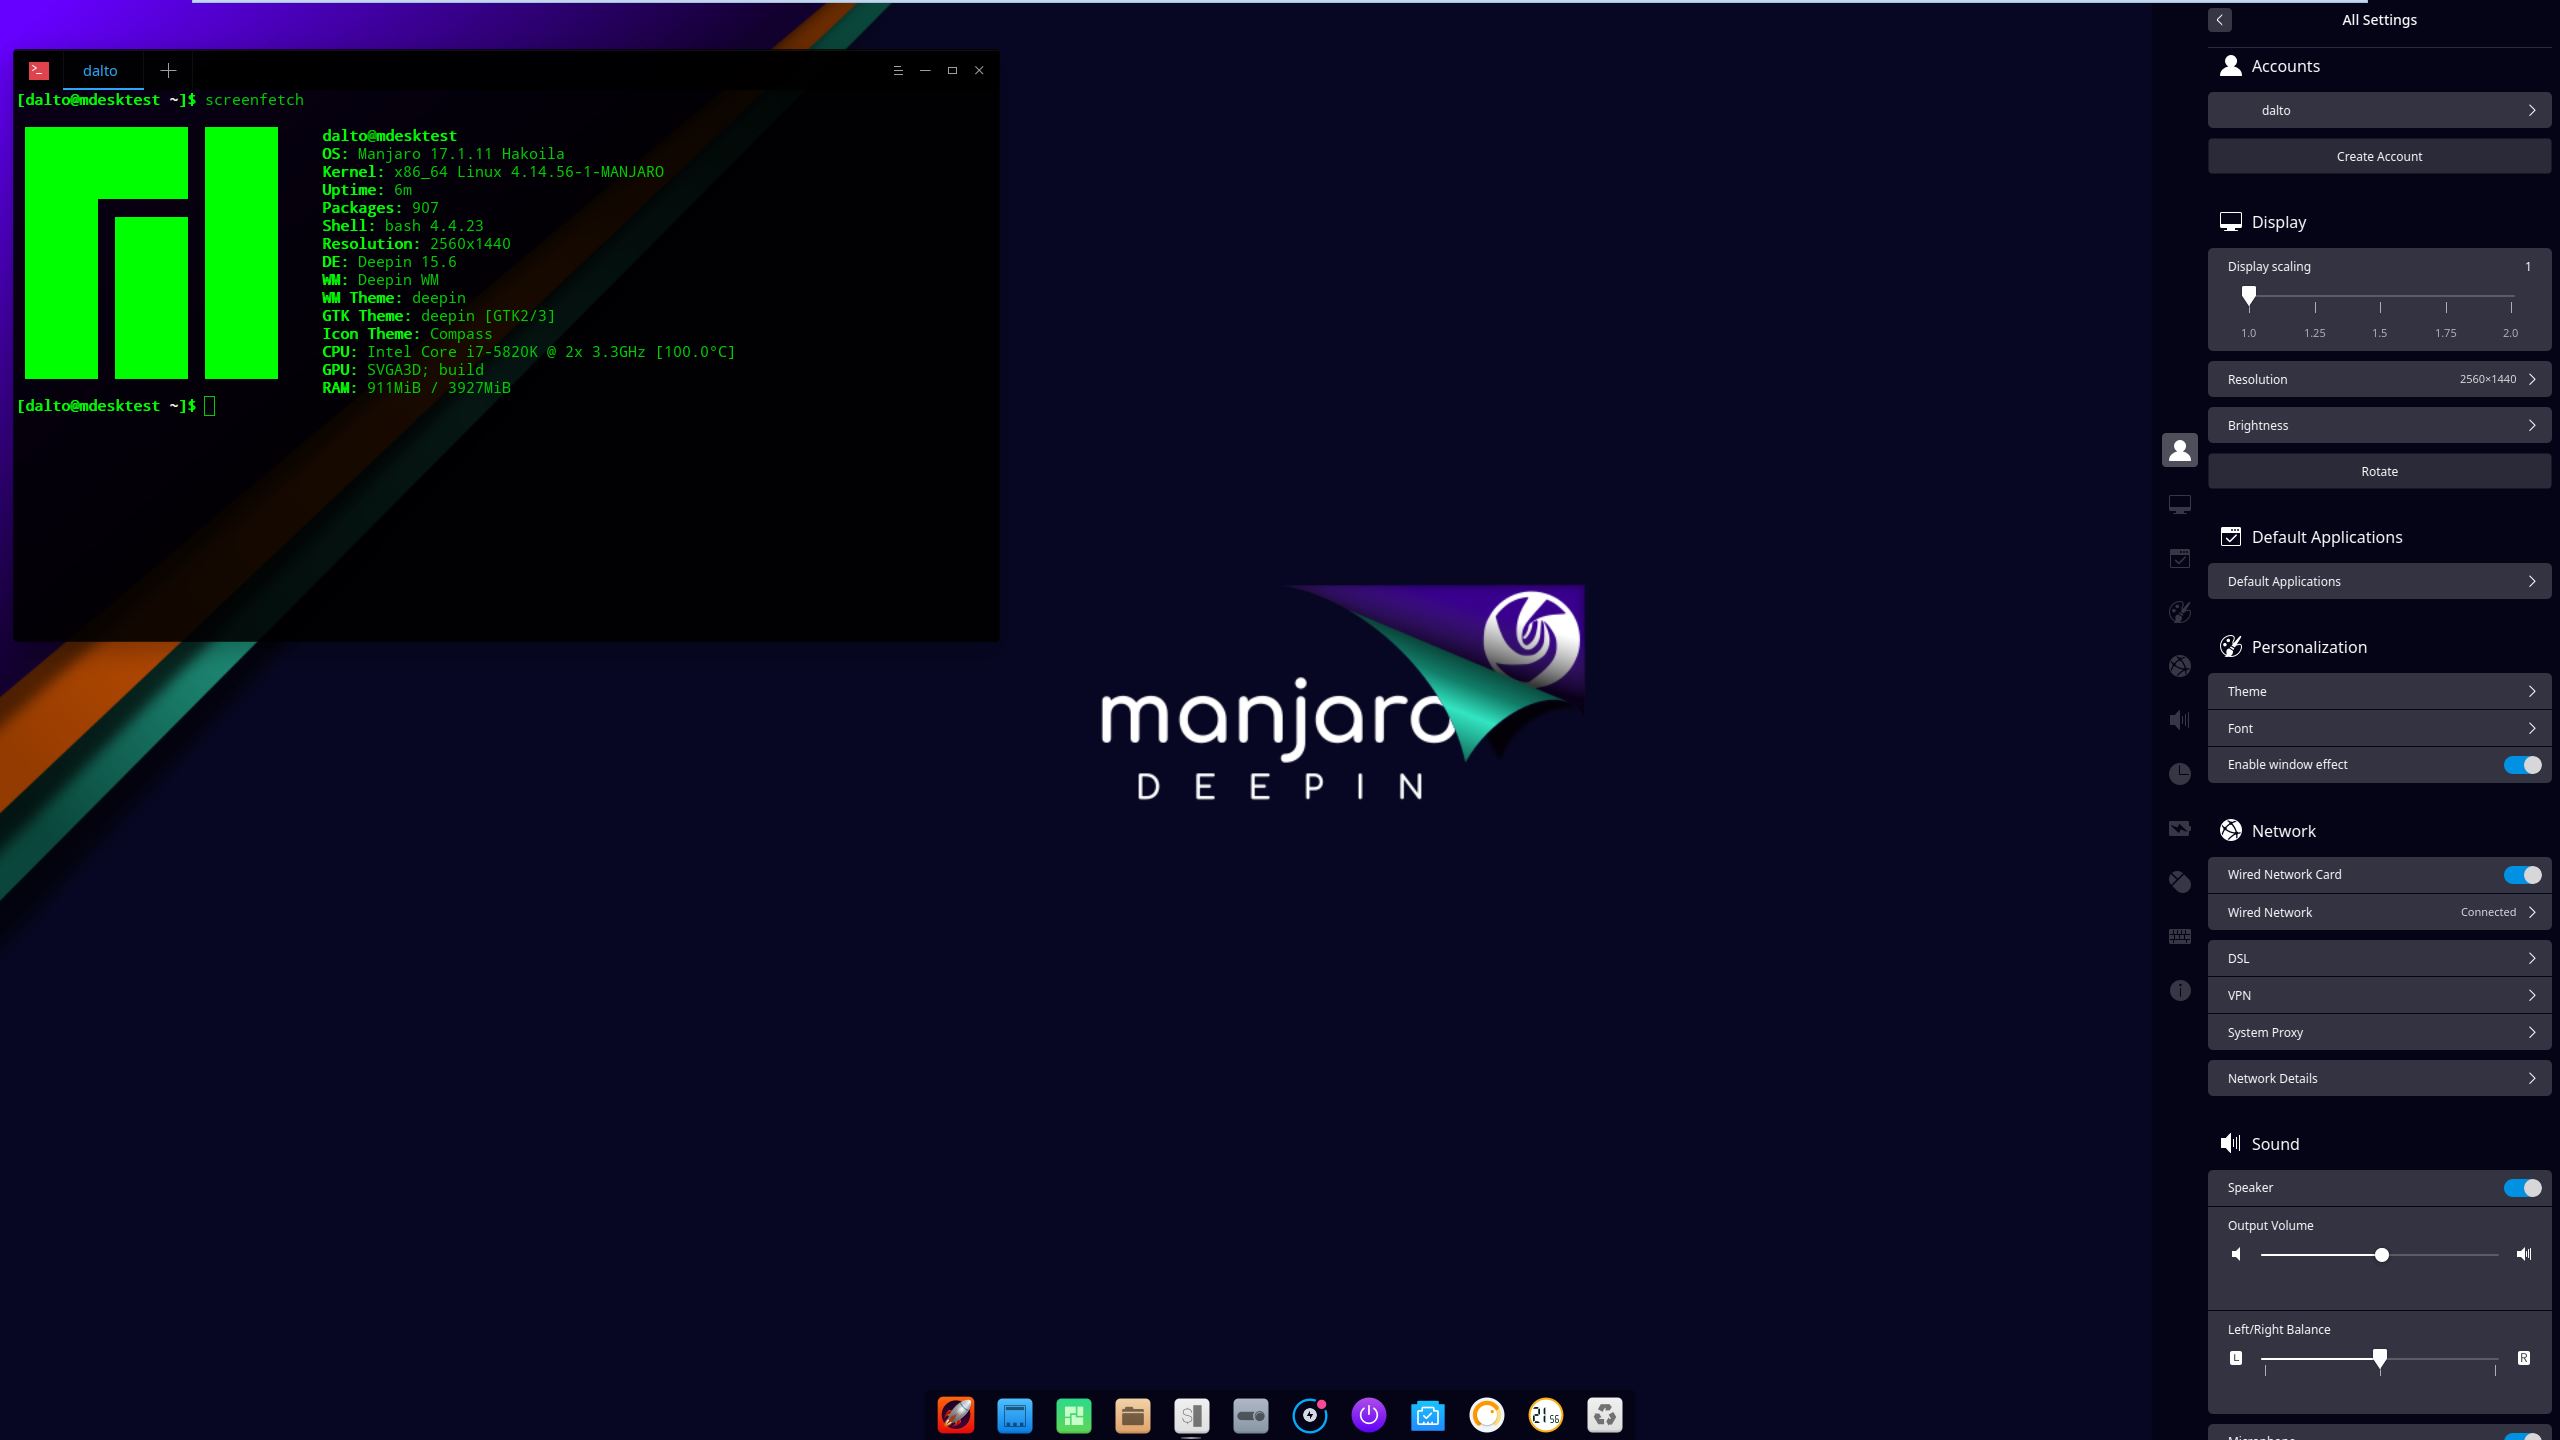
The Deepin Desktop is an elegant, easy to use desktop. It is lightly configurable. A 64 bit installation of Manjaro running deepin uses about 525MB of memory.
Install a basic deepin environment
Optional: Install the deepin applications suite
Optional: Install and use LightDM, the recommended display manager for deepin
Then edit /etc/lightdm/lightdm.conf, under [Seat:*] replace the greeter-session setting with greeter-session=lightdm-deepin-greeter
Optional: Install the Manjaro configuration and theming for deepin
Create a new user for the new desktop environment
Enlightenment
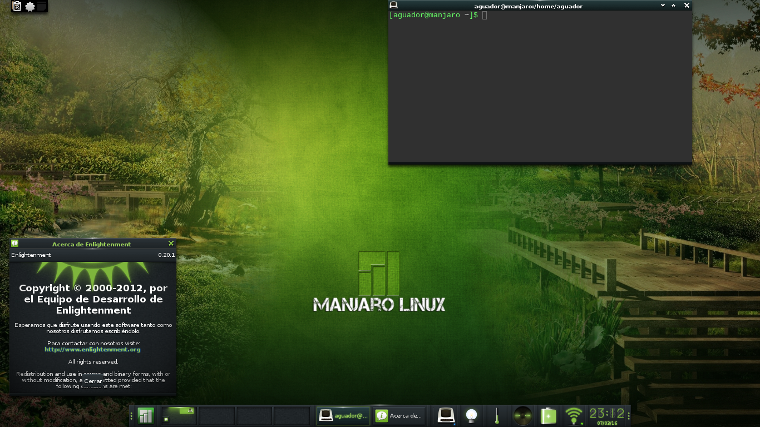
Enlightenment, sometimes known simply as E, is a lightweight desktop environment known for its configurability and tools for creating beautiful user interfaces using its Enlightenment Foundation Libraries (EFL). E started in 1997 as a stacking windows manager, emerging as a desktop environment with development release 0.17. E does not come with a broad array of tools by default, which can be an advantage for experienced users who want to customize their installation, and a disadvantage for users with little or no experience of Linux. E uses a few unique terms, for example referring to panels as “shelves”. A 64-bit installation of E uses about 160M of memory.
Install a basic E environment
Optional: Install and use Entrance, the recommended display manager for E
Entrance is available from the AUR in the package entrance-git. Information on how to install packages from AUR can be found here.
Optional: Install Manjaro themes for E
Create a new user for the new desktop environment
LXDE is a super-lightweight desktop environment that is very similar to XFCE, with the exception that it is not compatible with Compiz. As with XFCE, LXDE is also a somewhat basic desktop environment, lacking some modern features that would be expected, such as a search-bar to find applications and files. However, it is also an excellent choice for less powerful computers.
Install a basic lxde environment
Optional: Install and use LightDM, the recommended display manager for lxde
Optional: Install the Manjaro configuration and theming for lxde
To configure LightDM to match the community edition replace the contents of /etc/lightdm/lightdm-gtk-greeter.conf with
Create a new user for the new desktop environment
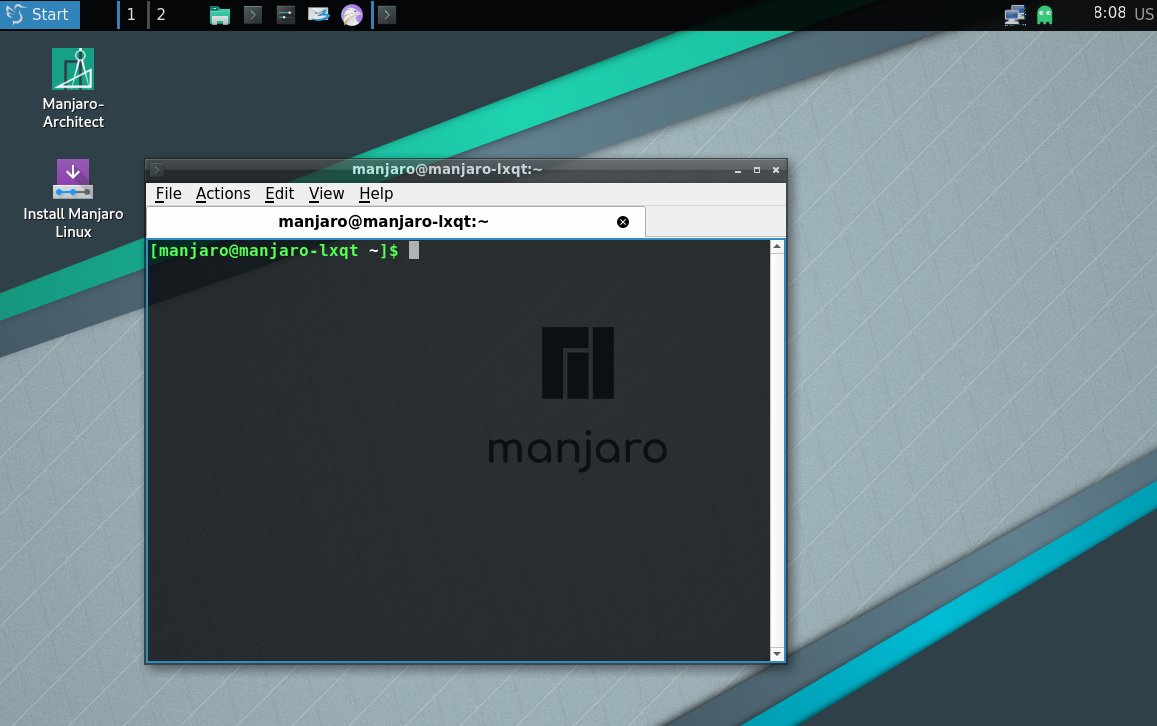
The LXQt Desktop Environment LXQt is a lightweight Qt desktop environment. It will not get in your way. It will not hang or slow down your system. It is focused on being a classic desktop with a modern look and feel. A 64 bit installation of Manjaro running lxqt uses about 250MB of memory.
Install a basic LXQt environment
Install and use LightDM, the recommended display manager for LXQt
edit /etc/lightdm/lightdm.conf, under [Seat:*] replace the greeter-session setting with greeter-session=lightdm-slick-greeter
Optional: Install the Manjaro configuration and theming for LXQt
Create a new user for the new desktop environment
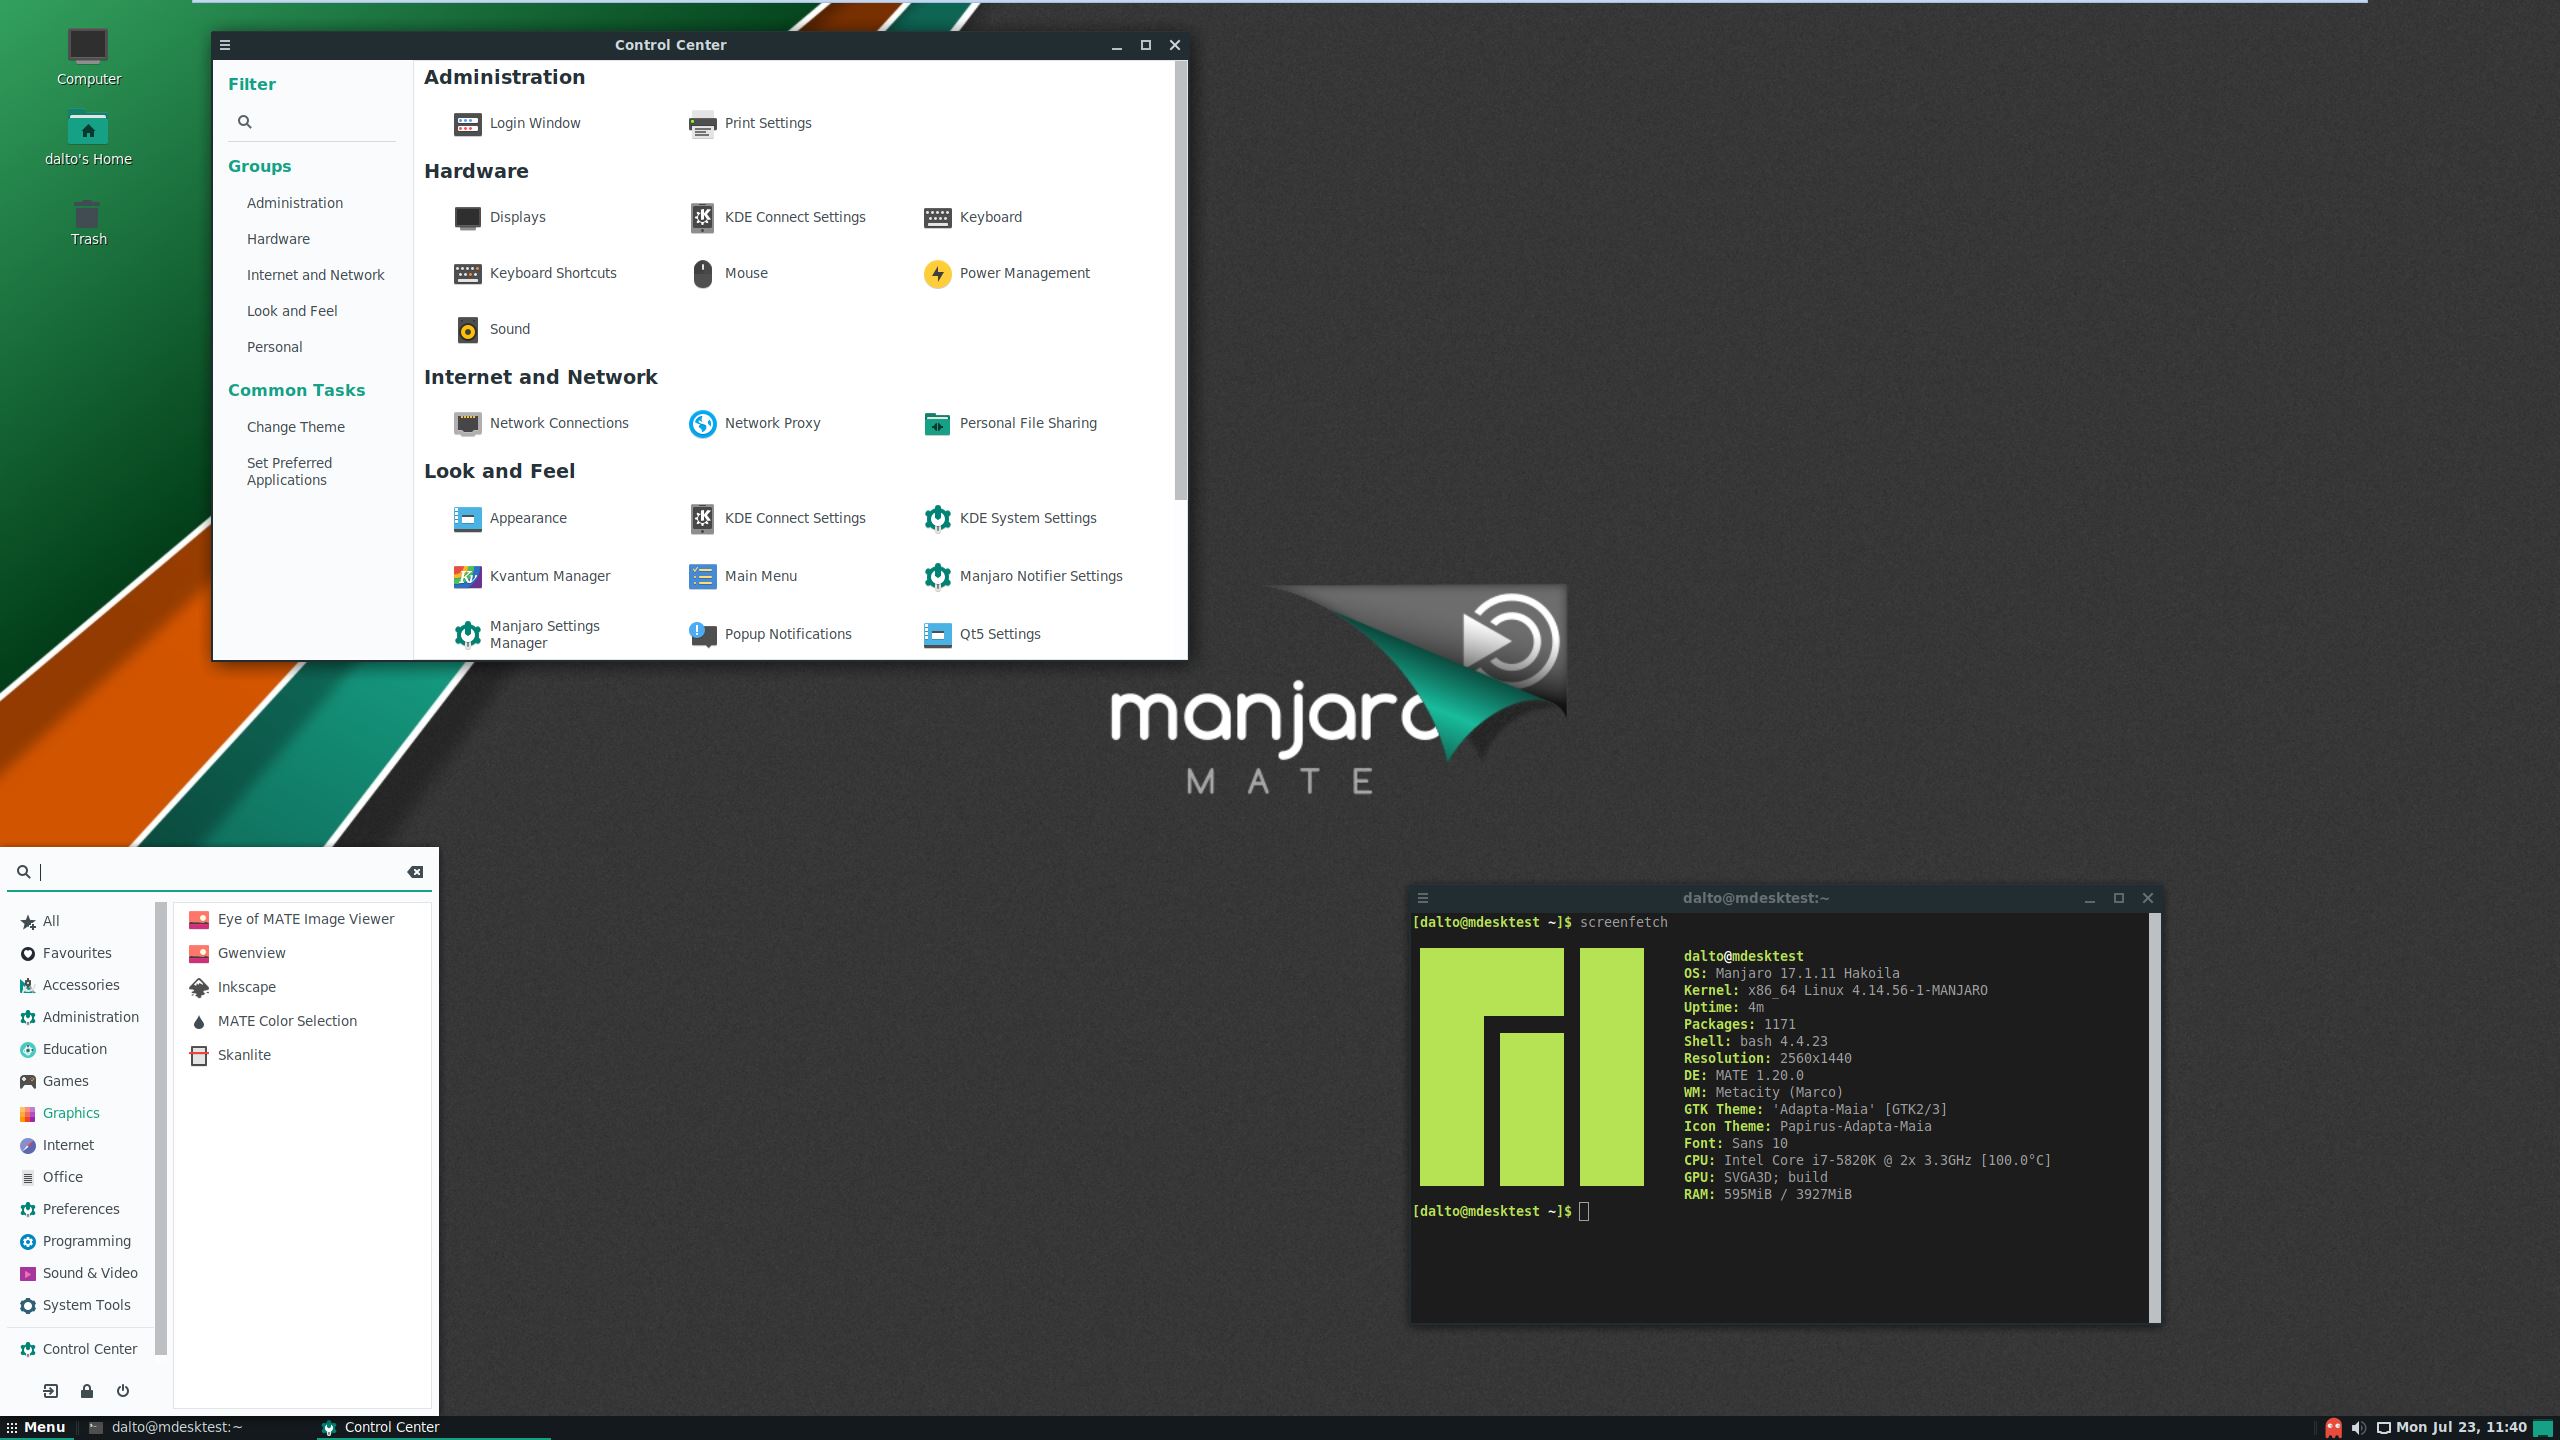
The MATE Desktop Environment is the continuation of GNOME 2. It provides an intuitive and attractive desktop environment using traditional metaphors for Linux and other Unix-like operating systems. MATE is under active development to add support for new technologies while preserving a traditional desktop experience. A 64 bit installation of Manjaro running MATE uses about 378MB of memory.
Install a basic mate environment
Optional: Install mate applications and configuration tools
Optional: Install and use LightDM, the recommended display manager for mate
edit /etc/lightdm/lightdm.conf, under [Seat:*] replace the greeter-session setting with greeter-session=lightdm-slick-greeter
Optional: Install the Manjaro configuration and theming for mate
To configure LightDM to match the community edition replace the contents of /etc/lightdm/slick-greeter.conf with
Create a new user for the new desktop environment
Although Desktop Environments commonly provide a good range of customisation options to suit personal taste and preference, they may still be seen as somewhat restrictive or controlled in the sense that they merely allow for the personalisation of their pre-defined components. However, certain Window Managers empower users to take a ‘do it yourself’ approach in order to create their own desktop environments. In essence, they may be used as a foundation on which to build upon, as literally every component and every aspect of the desktop is under the direct control and choice of the user. An environment may be as elaborate or as minimalistic as desired, and it is even possible to mix and match various components from other desktop environments.
Therefore extremely powerful and versatile, these window managers also carry the additional benefit of being faster and more resource efficient than pre-defined desktop environments. Interestingly, the super-lightweight LXDE environment is itself built on the Openbox window manager. There are two types of Window Manager: Stacking and Tiling. These names denote how application windows will behave on your desktop.
Stacking Window Managers
Openbox

Openbox is by far the most popular Window Manager available. Due to its popularity there is excellent documentation available, as well as a good choice of additional themes that may be downloaded. To install Openbox, enter the command:
To install a logout script, configuration application, menu-editor, and extra themes for Openbox, enter the following command:
Optional: Install the Manjaro configuration, theming, and tools for Openbox
FluxBox

FluxBox is another popular Window Manager. It is particularly notable for providing some features not seen in Openbox, such as tabbing, which allows for windows to be grouped together. To install FluxBox, enter the command:
Optional: Install the newsfetcher and workspace pager for Fluxbox
Optional: Install the Manjaro configuration, theming, and tools for Fluxbox
IceWM
IceWM is a Window Manager notable for perhaps being closer to a full desktop environment than Openbox or FluxBox. This includes providing a panel complete with menu, in addition to a workspace switcher. To install IceWM, enter the command:
To install a suite of tools and themes specifically for IceWM, enter the command:
Tiling Window Managers
Awesome
Awesome is a popular tiling Window Manager, notable for using the Lua language for configuration. To install Awesome, enter the command:
To install some extra widgets for Awesome, enter the command:
Alternatively you can install the Awesome Community Edition.
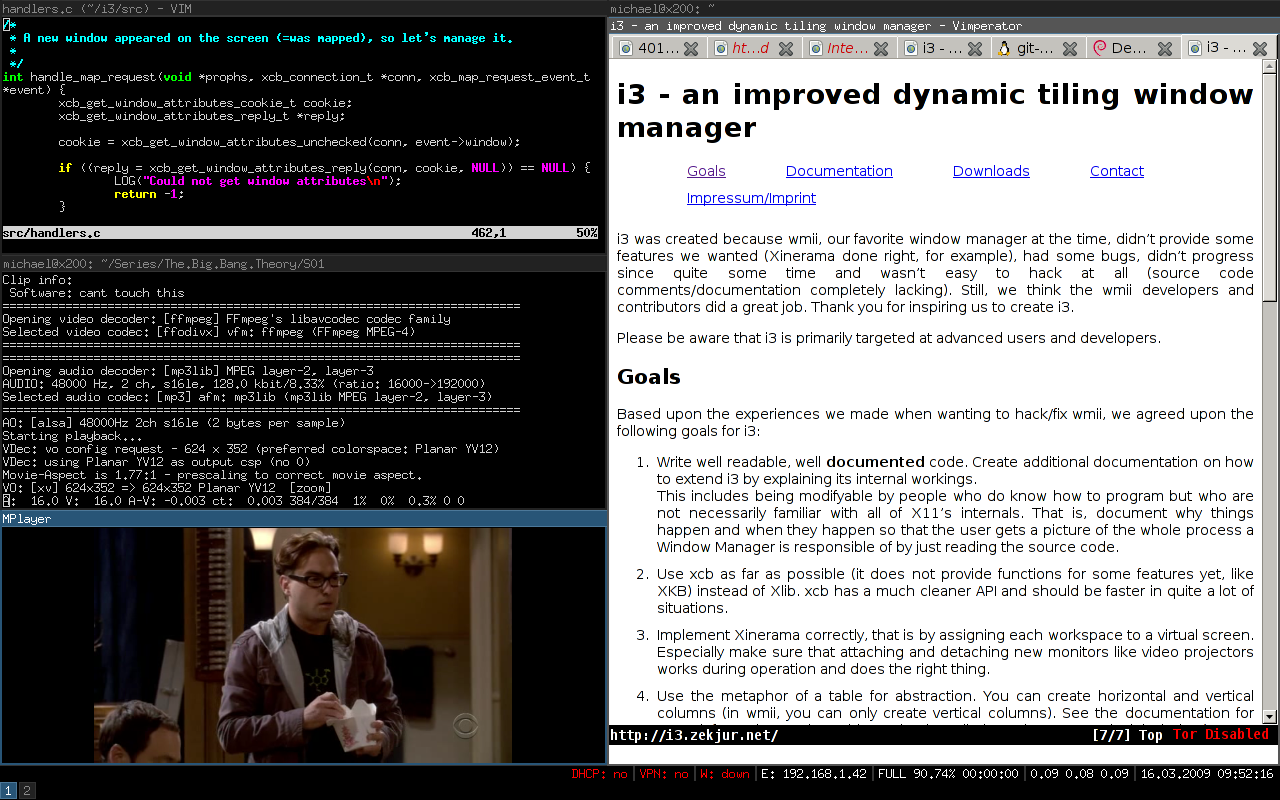
i3 is arguably the most popular tiling window manager available, and notable for using a single, completely self-contained configuration file. To install i3, enter the command:
To install a status bar and screen-locker for i3, enter the command:
Установка Manjaro Linux 18 и обзор дистрибутива
В данном материале мы поговорим о самом популярном дистрибутиве Linux на текущий момент по версии сайта DistroWatch, Manjaro Linux, мы подробно разберем процесс установки Manjaro на компьютер, на примере 18 версии, а также рассмотрим особенности данного дистрибутива.
Что такое Manjaro Linux?
Manjaro Linux – это дистрибутив операционной системы Linux, который основан на Arch Linux. В Manjaro Linux в качестве графической оболочки по умолчанию можно использовать: Xfce, KDE и GNOME. Данный дистрибутив ориентирован на начинающих пользователей Linux и предназначен для обычных домашних компьютеров, при этом он имеет всю мощь Arch Linux. Как Вы, наверное, знаете, Arch Linux в большей степени подходит продвинутым пользователям Linux, поэтому можно сказать, что Manjaro Linux – это адаптированная под новичков версия Arch Linux.
Дистрибутив Manjaro Linux разрабатывает и развивает отдельная команда разработчиков, у Manjaro есть свои собственные репозитории, не связанные с репозиториями Arch Linux.
По умолчанию в Manjaro Linux включено все необходимое для работы программное обеспечение: офисный пакет LibreOffice, браузер Mozilla Firefox, почтовый клиент Mozilla Thunderbird и другие не менее нужные и важные приложения, иными словами, после установки Manjaro Linux Вам не нужно будет искать и устанавливать дополнительное ПО, если только по желанию.
В целом дистрибутив Manjaro Linux неплохой, мне нравится, ну не зря же он так быстро набрал популярность и занял лидирующие места в топе DistroWatch.
Пошаговая установка Manjaro Linux 18
Сейчас мы с Вами рассмотрим все действия, которые необходимо выполнить, для того чтобы установить Manjaro Linux на компьютер.
На текущий момент самая актуальная версия Manjaro Linux 18, на примере именно этой версии мы и будем рассматривать процесс установки.
Как было уже отмечено, Manjaro Linux по умолчанию официально поддерживает несколько графических оболочек, для каждой у Manjaro Linux есть отдельная редакция, сегодня мы будем устанавливать Manjaro Linux 18 KDE, т.е. с рабочим столом KDE.
На заметку! Новичкам рекомендую почитать мою книгу « Linux для обычных пользователей » – в ней я подробно рассказываю про основы операционной системы Linux и как пользоваться этой системой без командной строки
Шаг 1 – Скачивание установочного образа Manjaro Linux
Первое, с чего необходимо начать, это с загрузки установочного ISO образа. Скачать Manjaro Linux можно, конечно же, с официального сайта (рекомендую скачивать любое программное обеспечение только с официальных ресурсов).
Для того чтобы скачать Manjaro Linux, перейдите на страницу загрузки https://manjaro.org/get-manjaro/, в нашем случае в разделе «Manjaro KDE Edition» выберите удобный способ скачивания (по прямой ссылке или через торрент, с помощью торрент обычно быстрей) и с помощью соответствующих кнопок начните загрузку.
В итоге у Вас должен загрузиться ISO образ диска manjaro-kde-18.0-stable-x86_64.iso размером примерно 2 гигабайта.
Шаг 2 – Запись установочного ISO образа на диск или флешку
Теперь, когда у Вас уже есть установочный ISO образ Manjaro Linux, Вам необходимо создать загрузочный установочный носитель, т.е. записать ISO образ на DVD диск или USB флешку.
Это можно сделать с помощью следующих программ (ссылки на инструкции по работе с некоторыми программами я также прилагаю).
В Windows:
В Linux:
Шаг 3 – Загрузка с установочного носителя
После того как установочный носитель Вы подготовили, можно переходить к процессу установки, для этого загружаемся с данного носителя. Чтобы это сделать в BIOS, необходимо выставить данный носитель на первое место в порядке загрузки устройств. Подробней об этом мы говорили в материале – «Как загрузиться с флешки? Изменение порядка загрузки устройств в BIOS».
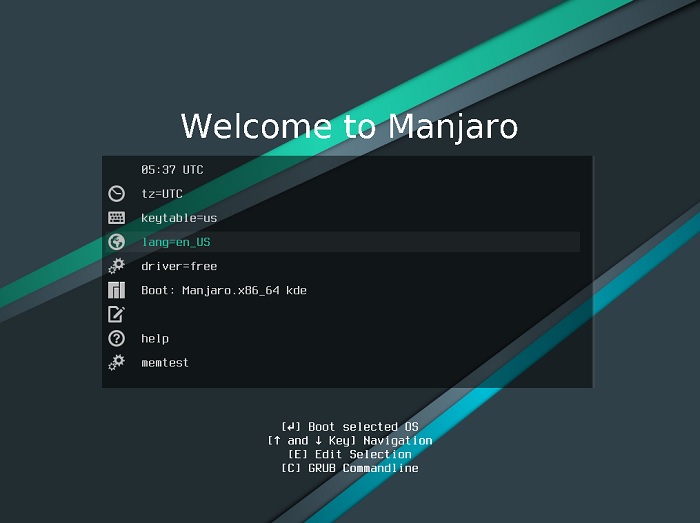
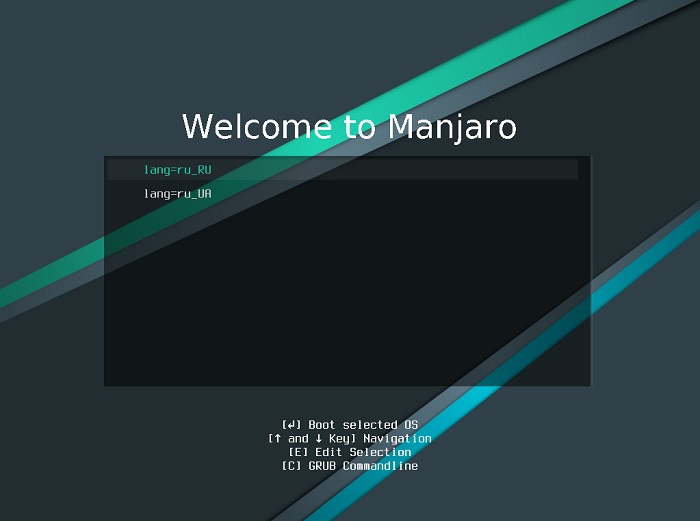
После того как Вы загрузитесь с носителя, Вы попадете в меню, сначала выбираем язык, с которым будет загружена Live-версия Manjaro Linux и, соответственно, программа установки. Заходим в настройки «lang=en_US».
Затем ищем нужный язык и выбираем его.
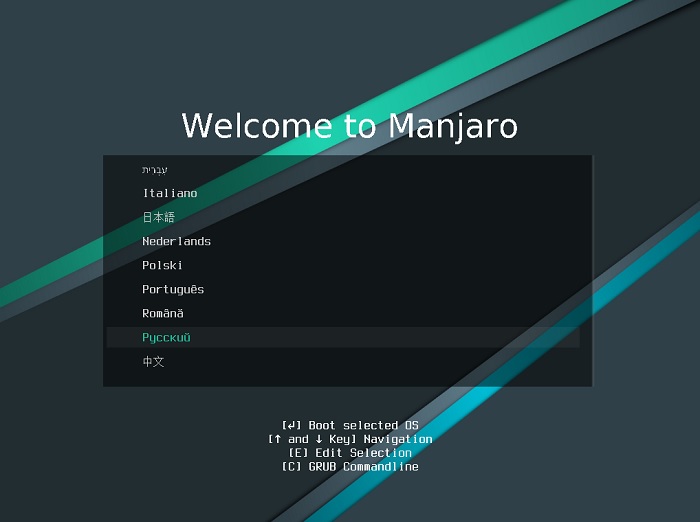
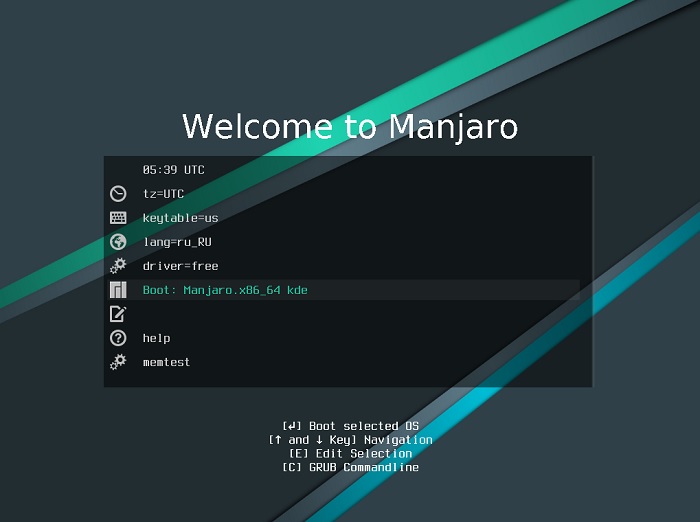
Далее выбираем пункт «ru_RU».
Язык выбран, после этого можем запускать систему, выбираем пункт «Boot: Manjaro.x86_64 KDE».
Шаг 4 – Запуск программы установки
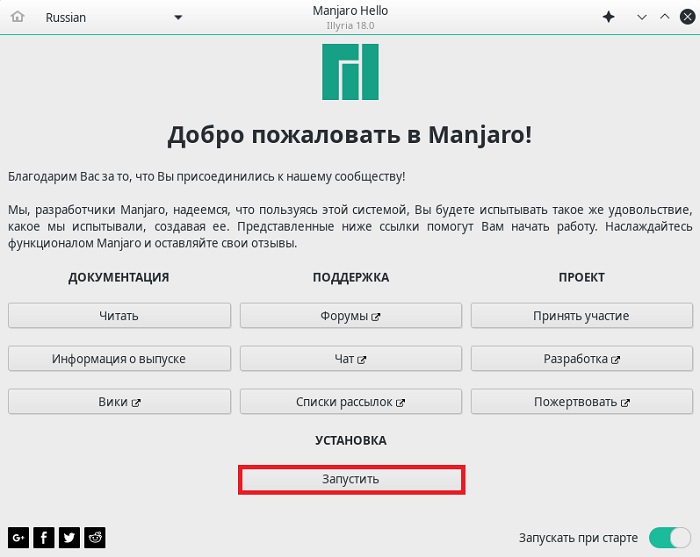
В итоге у Вас загрузится Live-версия Manjaro Linux, Вы, кстати, можете посмотреть на систему, протестировать ее, перед тем как переходить к установке на жесткий диск, вдруг она Вам не приглянется.
Для того чтобы начать установку на компьютер, в окне приветствия нажимайте на кнопку «Запустить».
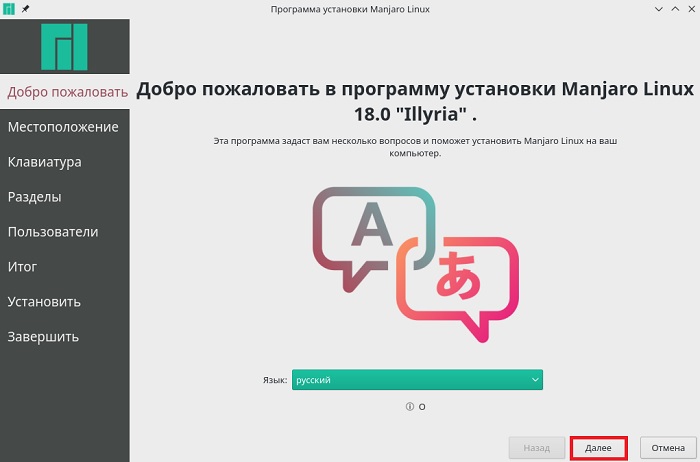
Шаг 5 – Выбор языка
Запустится программа установки Manjaro Linux, выбираем язык, с которым будет установлена система, нажимаем «Далее».
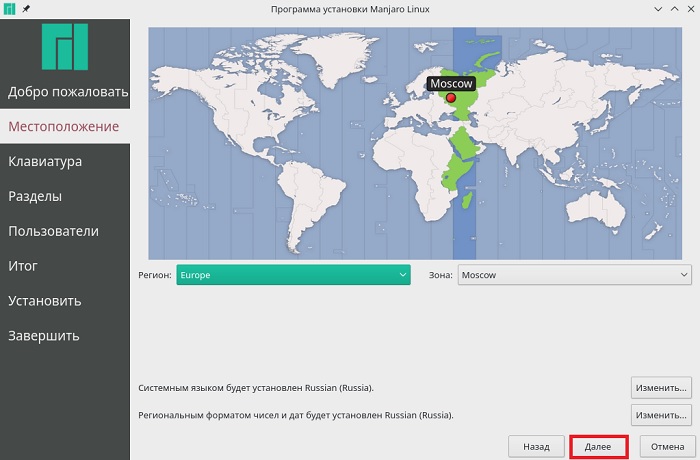
Шаг 6 – Указываем местоположение
Для того чтобы настроить часовой пояс, на данном шаге указываем свое местоположение (можно просто кликнуть мышкой в нужное место), также здесь можно задать региональные настройки (язык, формат).
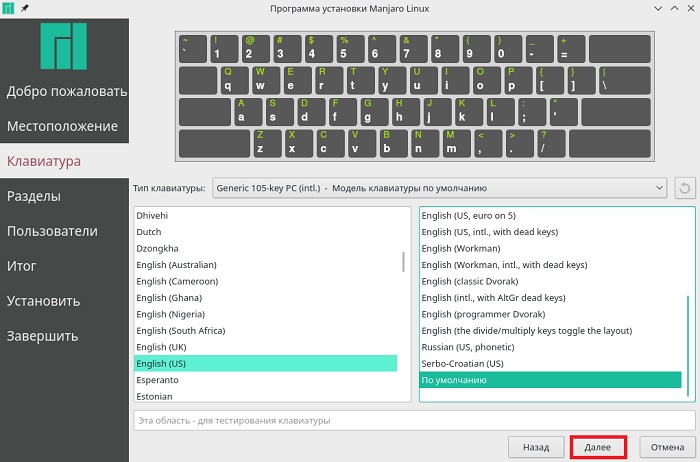
Шаг 7 – Выбор раскладки клавиатуры
Затем выбираем раскладку клавиатуры, по умолчанию она уже выбрана в соответствии с языком, но нам нужно выбрать английскую раскладку «English (US)», так как когда мы будем создавать пользователя, нам нужно будет вводить некоторые данные на английском языке, но на этапе установки нам доступна только одна раскладка.
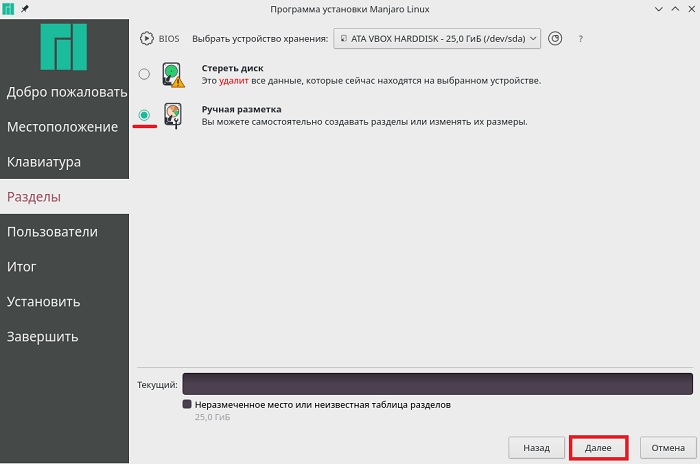
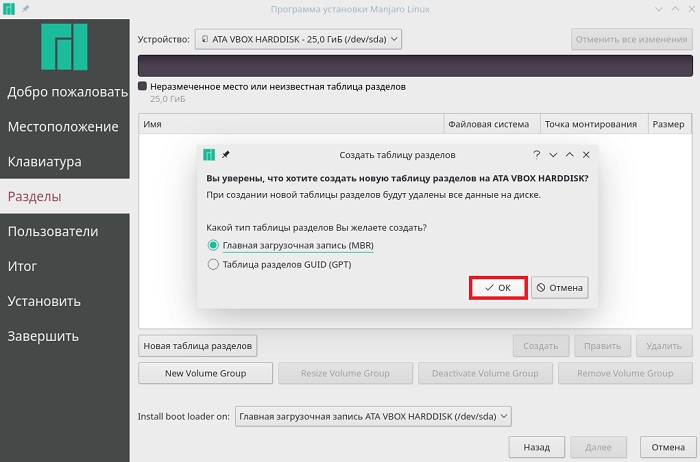
Шаг 8 – Разметка жесткого диска
На этом шаге нам нужно выполнить разметку жесткого диска, т.е. создать необходимые нам разделы. На моем тестовом жестком диске нет разделов, так как он чистый, поэтому я буду полностью заново создавать таблицу разделов.
Программа установки предлагает несколько режимов разметки, в моем случае это:
Разметку жесткого диска я буду делать вручную, поэтому выбираю пункт «Ручная разметка» и нажимаю «Далее».
В случае с чистым жестким диском, нужно создать новую таблицу разделов, для этого нажимаем кнопку «Новая таблица разделов».
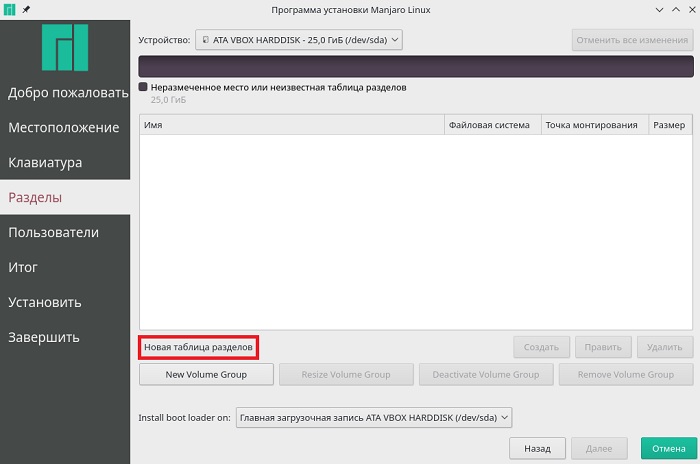
Потом выбираем тип таблицы разделов, обычно это «Главная загрузочная запись (MBR)», нажимаем «ОК».
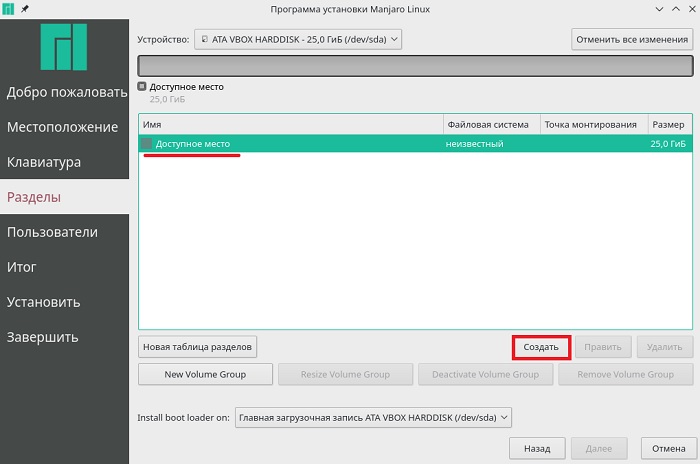
У нас отобразится доступное место для разметки, выбираем его и нажимаем кнопку «Создать».
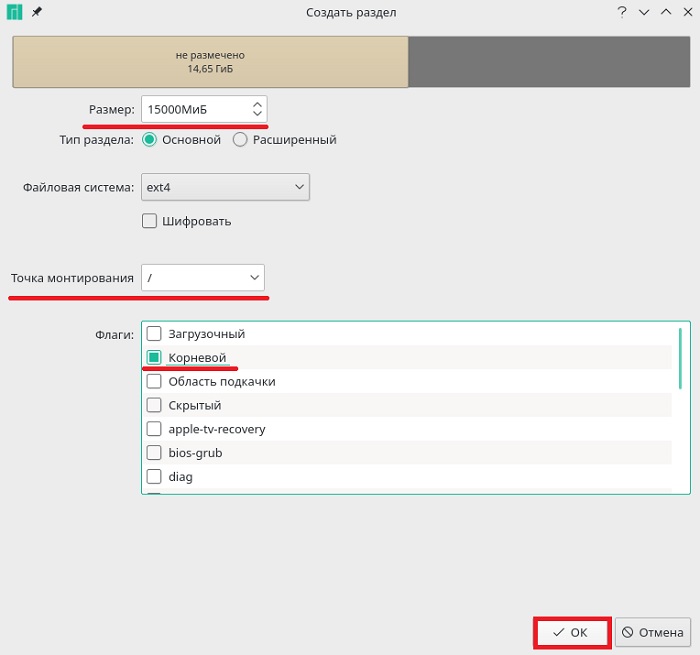
Сначала нам необходимо создать обязательный системный раздел (корневой раздел) для самой системы. Для этого указываем следующие данные:
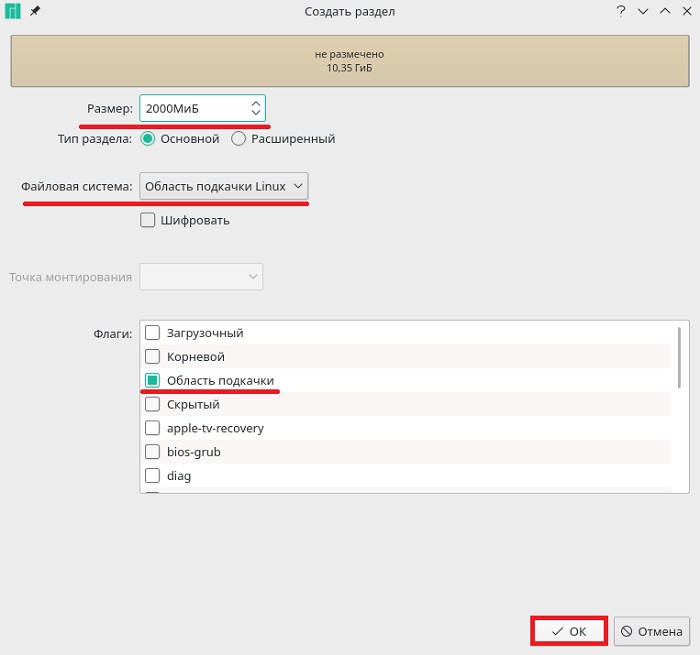
Далее давайте создадим раздел для подкачки SWAP (SWAP – это место для хранения временных данных в случаях, когда оперативной памяти недостаточно, грубо говоря, это аналог файла подкачки в Windows). Для этого также выбираем «Доступное место» и нажимаем кнопку «Создать».
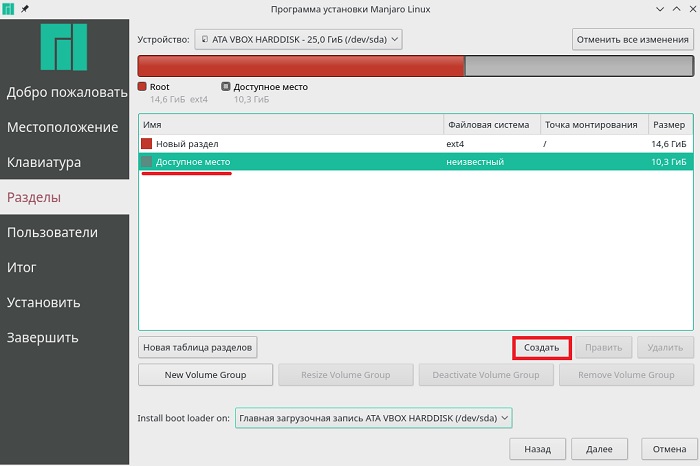
Для своп-раздела указываем следующие данные:
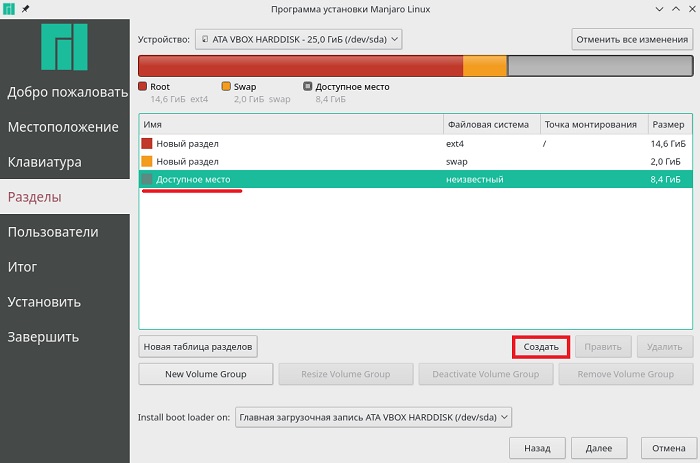
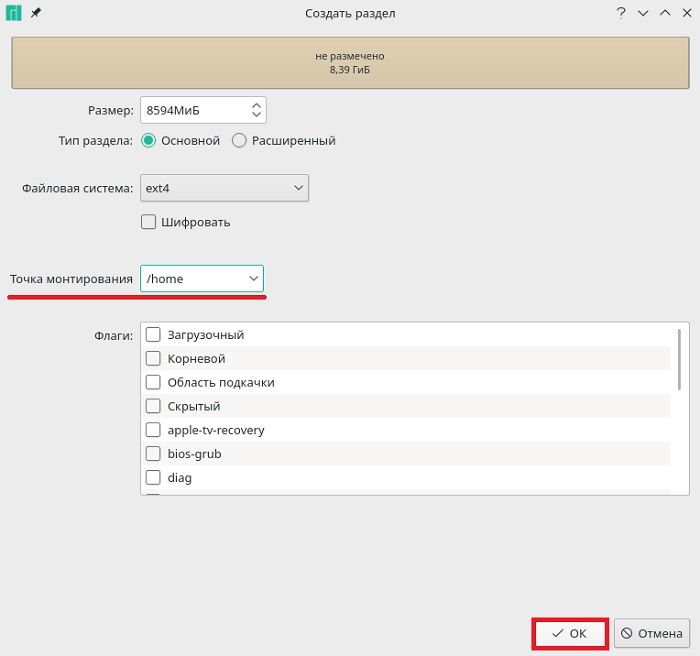
Нам осталось создать «Домашний раздел», т.е. раздел для пользовательских данных. Он необходим для того, чтобы в случае переустановки системы или если Вы захотите установить другой дистрибутив Linux, все Ваши личные данные (документы, фото, видео) остались на месте.
Для этого мы, как и в предыдущих случаях, выбираем доступное место и нажимаем на кнопку «Создать».
Для создания домашнего раздела необходимо указать:
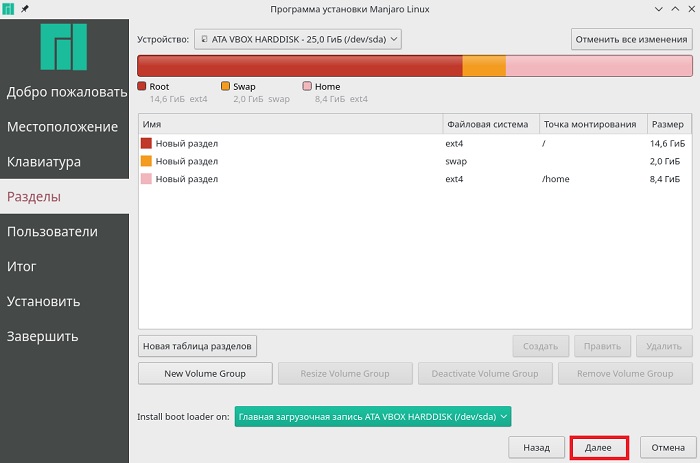
Разметка диска закончена, для продолжения установки нажимаем «Далее».
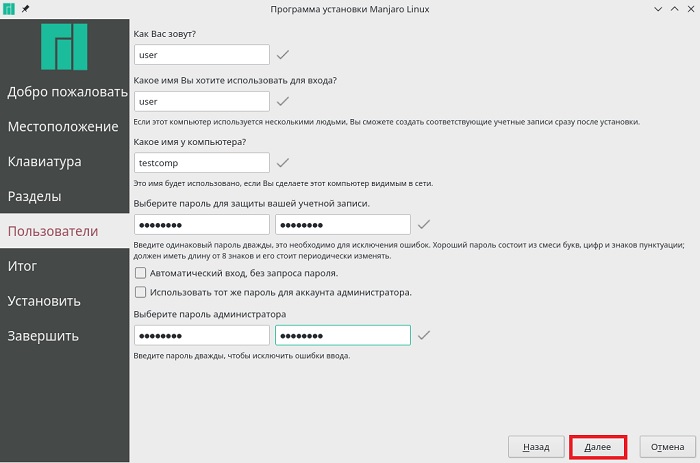
Шаг 9 – Создание пользователя
Теперь нам необходимо создать учетную запись, т.е. пользователя, под которым мы будем работать. Вводим имя, логин, имя компьютера, пароль и подтверждаем его. Если хотите, можете задать отдельный пароль для администратора, для этого введите пароль в соответствующие поля. Если не хотите, то можете просто поставить галочку «Использовать тот же пароль для аккаунта администратора». В тех случаях, когда Вы не хотите вообще вводить пароль при входе в систему, можете поставить галочку «Автоматический вход, без запроса пароля», однако это лучше не делать, если за компьютером работает несколько пользователей, в целях безопасности.
Вводим данные и нажимаем «Далее».
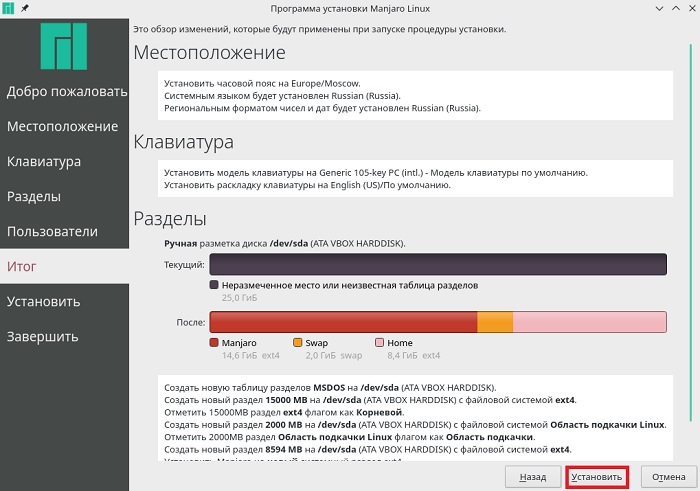
Шаг 10 – Проверка данных и запуск установки
Все необходимые настройки мы внесли, на данном шаге мы можем проверить все введенные данные, перед тем как начать установку, если все хорошо, то нажимаем «Установить».
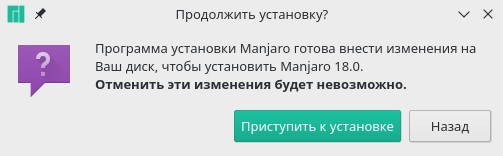
Программа установки Manjaro Linux запросит от Вас подтверждения, нажимаем «Приступить к установке».
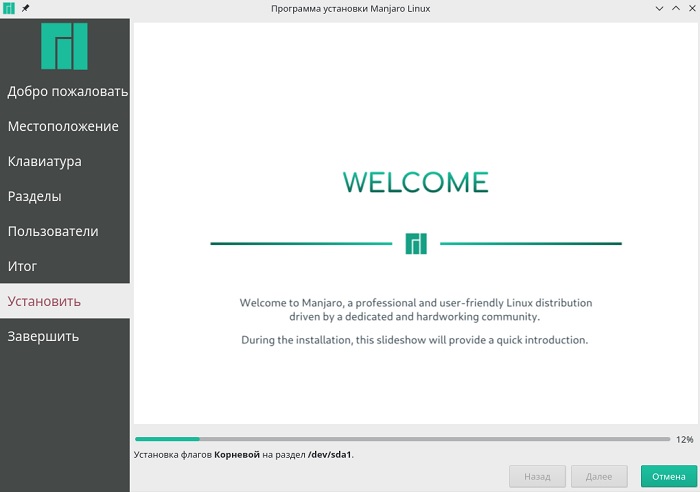
Установка началась. Смотрим слайды, правда, на английском языке.
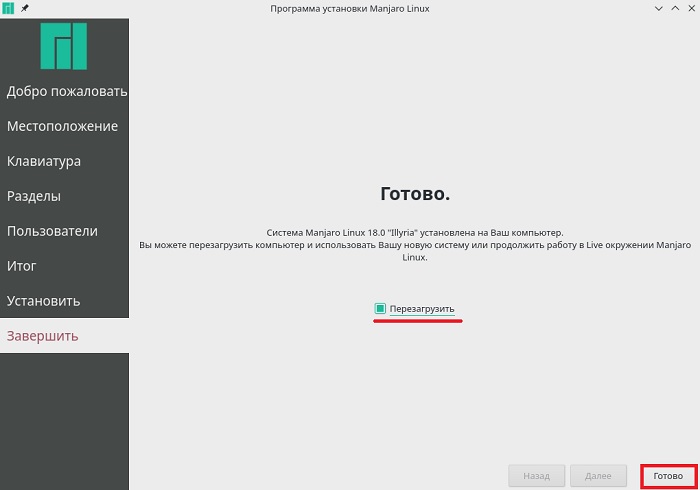
Шаг 11 – Завершение установки
Когда появится сообщение «Готово», это будет означать, что установка Manjaro Linux закончена. Для того чтобы сразу перезагрузиться, мы можем отметить пункт «Перезагрузить».
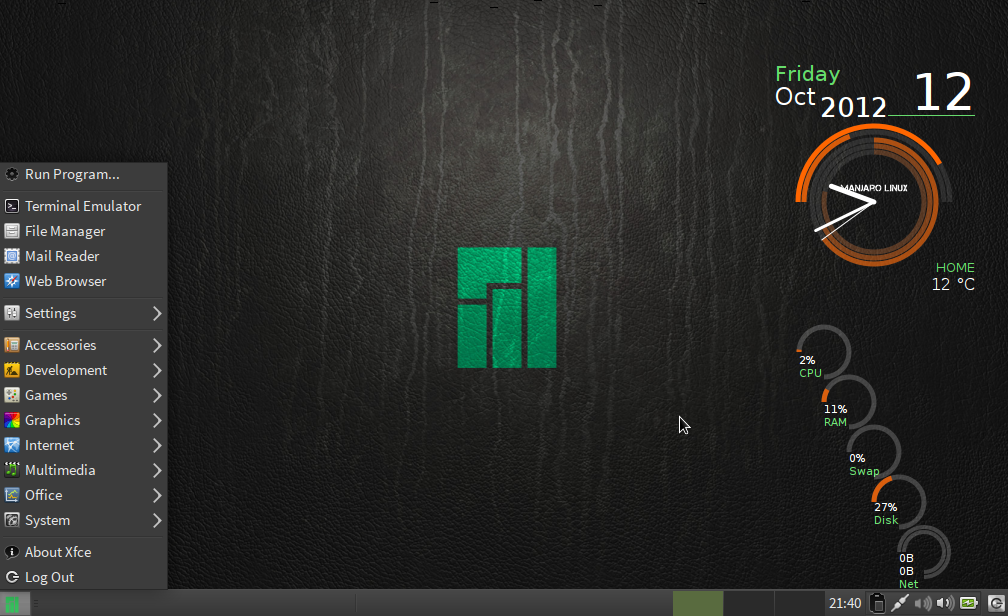
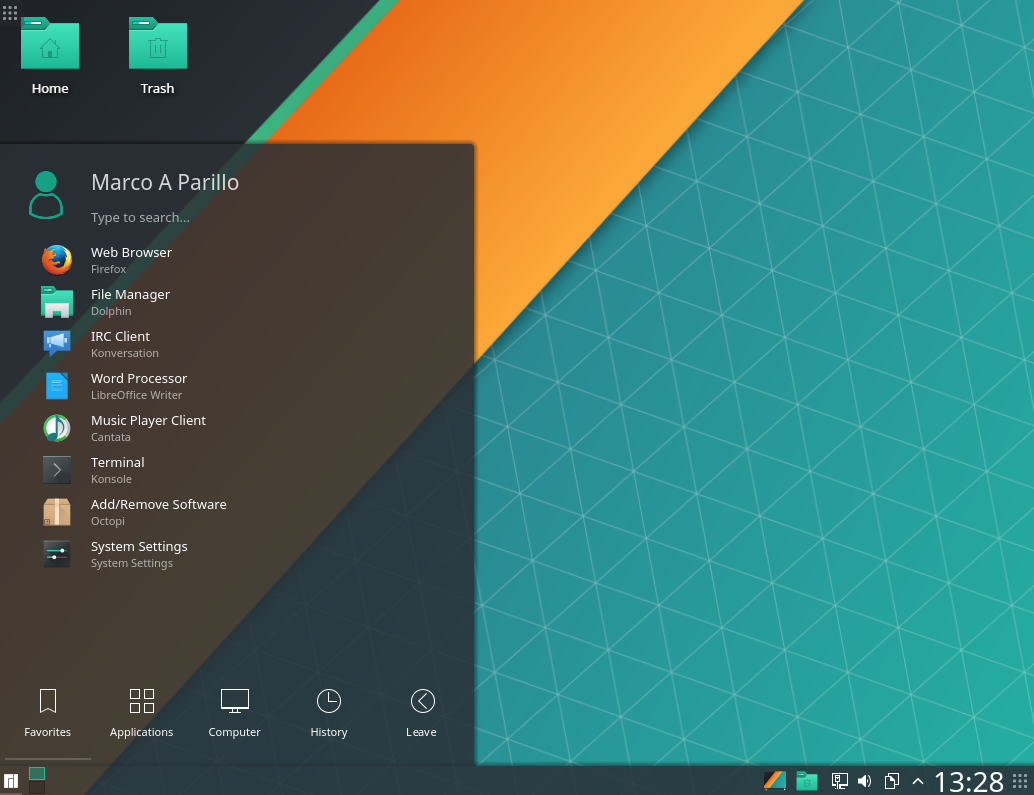
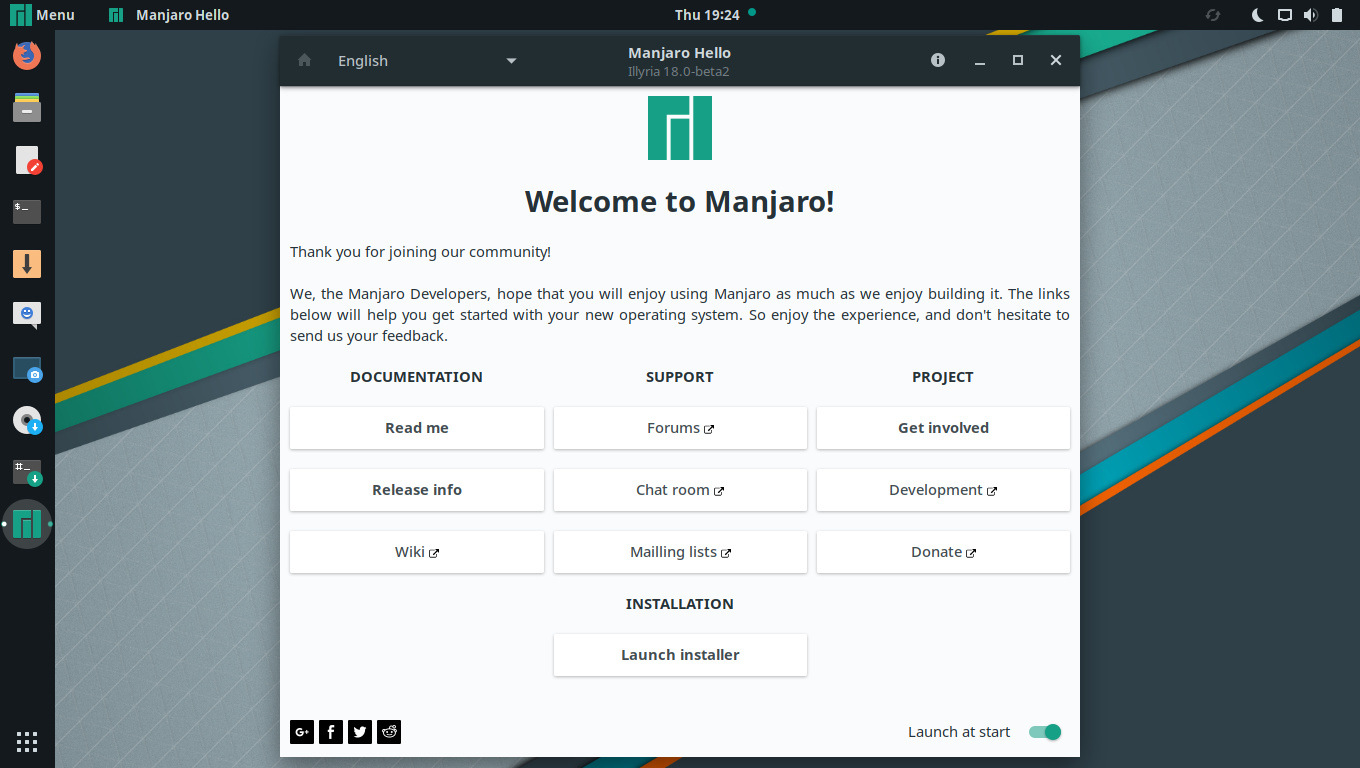
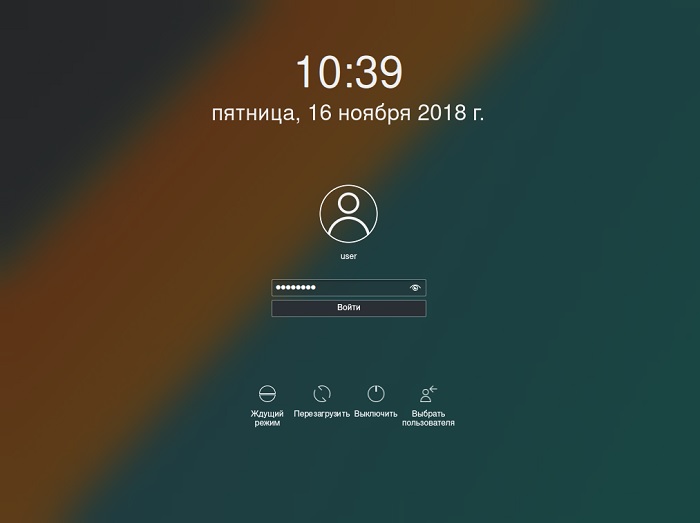
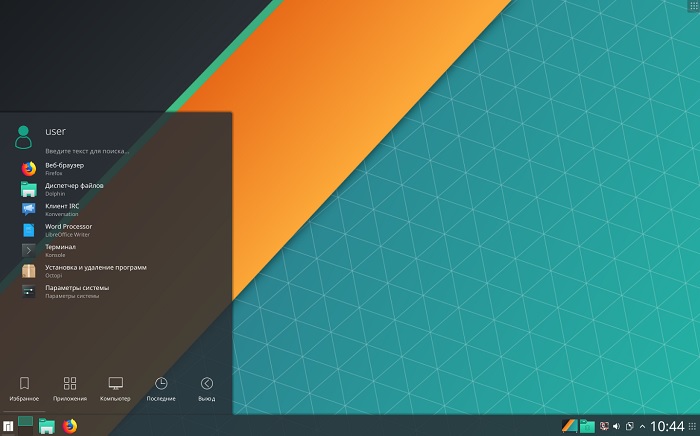
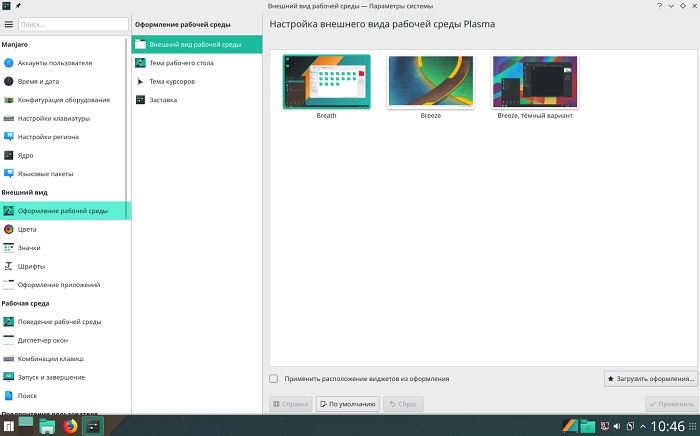
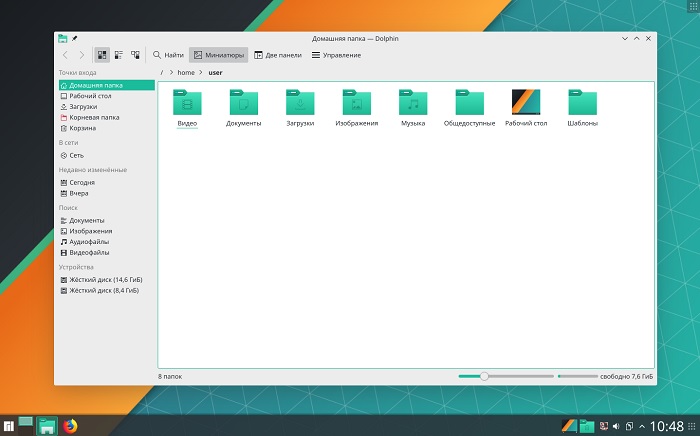
Скриншоты Manjaro Linux 18
Экран входа в систему
Рабочий стол
Параметры системы
Файловой менеджер
Вот мы и рассмотрели установку Manjaro Linux. В следующем материале я расскажу, как настроить русскую раскладку клавиатуры, ведь после установки в системе присутствует только одна раскладка, которую мы выбрали в процессе установки, а также покажу, как задать привычное сочетание клавиш для переключения раскладки, так как в Manjaro Linux по умолчанию используется комбинация клавиш «Ctrl+Alt+K», многих, наверное, данная комбинация будет не устраивать.
Заметка! Статью про настройку раскладки клавиатуры опубликовал, вот она – «Как настроить раскладку клавиатуры в Manjaro Linux KDE?».